French tips have made a remarkable comeback, but with a modern twist: the coffin shape. This comprehensive guide walks you through everything you need to know about creating stunning coffin French tip nails. Whether you're a beginner just starting your nail journey or an experienced nail enthusiast looking to perfect your technique, this guide has something for everyone.
We've broken down the content into 13 easy-to-navigate sections. Simply click on any section below to dive into the specific topic that interests you most.
Guide Sections
I. Introduction
The resurgence of the classic French manicure and why coffin shape is trending
II. Understanding Coffin French Tip Nails
What makes coffin shape unique and why it works with French tips
III. Essential Tools & Materials
Everything you need for perfect coffin French tips
IV. Nail Preparation
The foundation of perfect French tips
V. Creating Basic Coffin French Tips
Step-by-step process for beginners
VI. Advanced Techniques
For salon-quality results
VII. 2025's Hottest Trends
Latest French tip variations
VIII. Common Mistakes
And how to avoid them
IX. Maintaining Your Coffin French Tips
Keep your manicure looking fresh
X. Inspiration Gallery
For every occasion
XI. Expert Interview Insights
Professional tips and future trends
XII. Conclusion
Your French tip journey
XIII. Resources and References
Additional learning materials
Intro
Basics
Tools
Prep
Basic Technique
Advanced
Trends
Mistakes
Maintenance
Inspiration
Experts
Conclusion
Resources
I. Introduction
The Resurgence of the Classic French Manicure in Modern Nail Art
The French manicure, once a staple of the 90s and early 2000s, has made a triumphant return to the nail art scene. However, today's French tips are far from the basic white-tipped look of decades past. The modern revival incorporates contemporary nail shapes, innovative techniques, and creative variations that breathe new life into this classic style.
Why Coffin French Tips Are Dominating 2025 Nail Trends
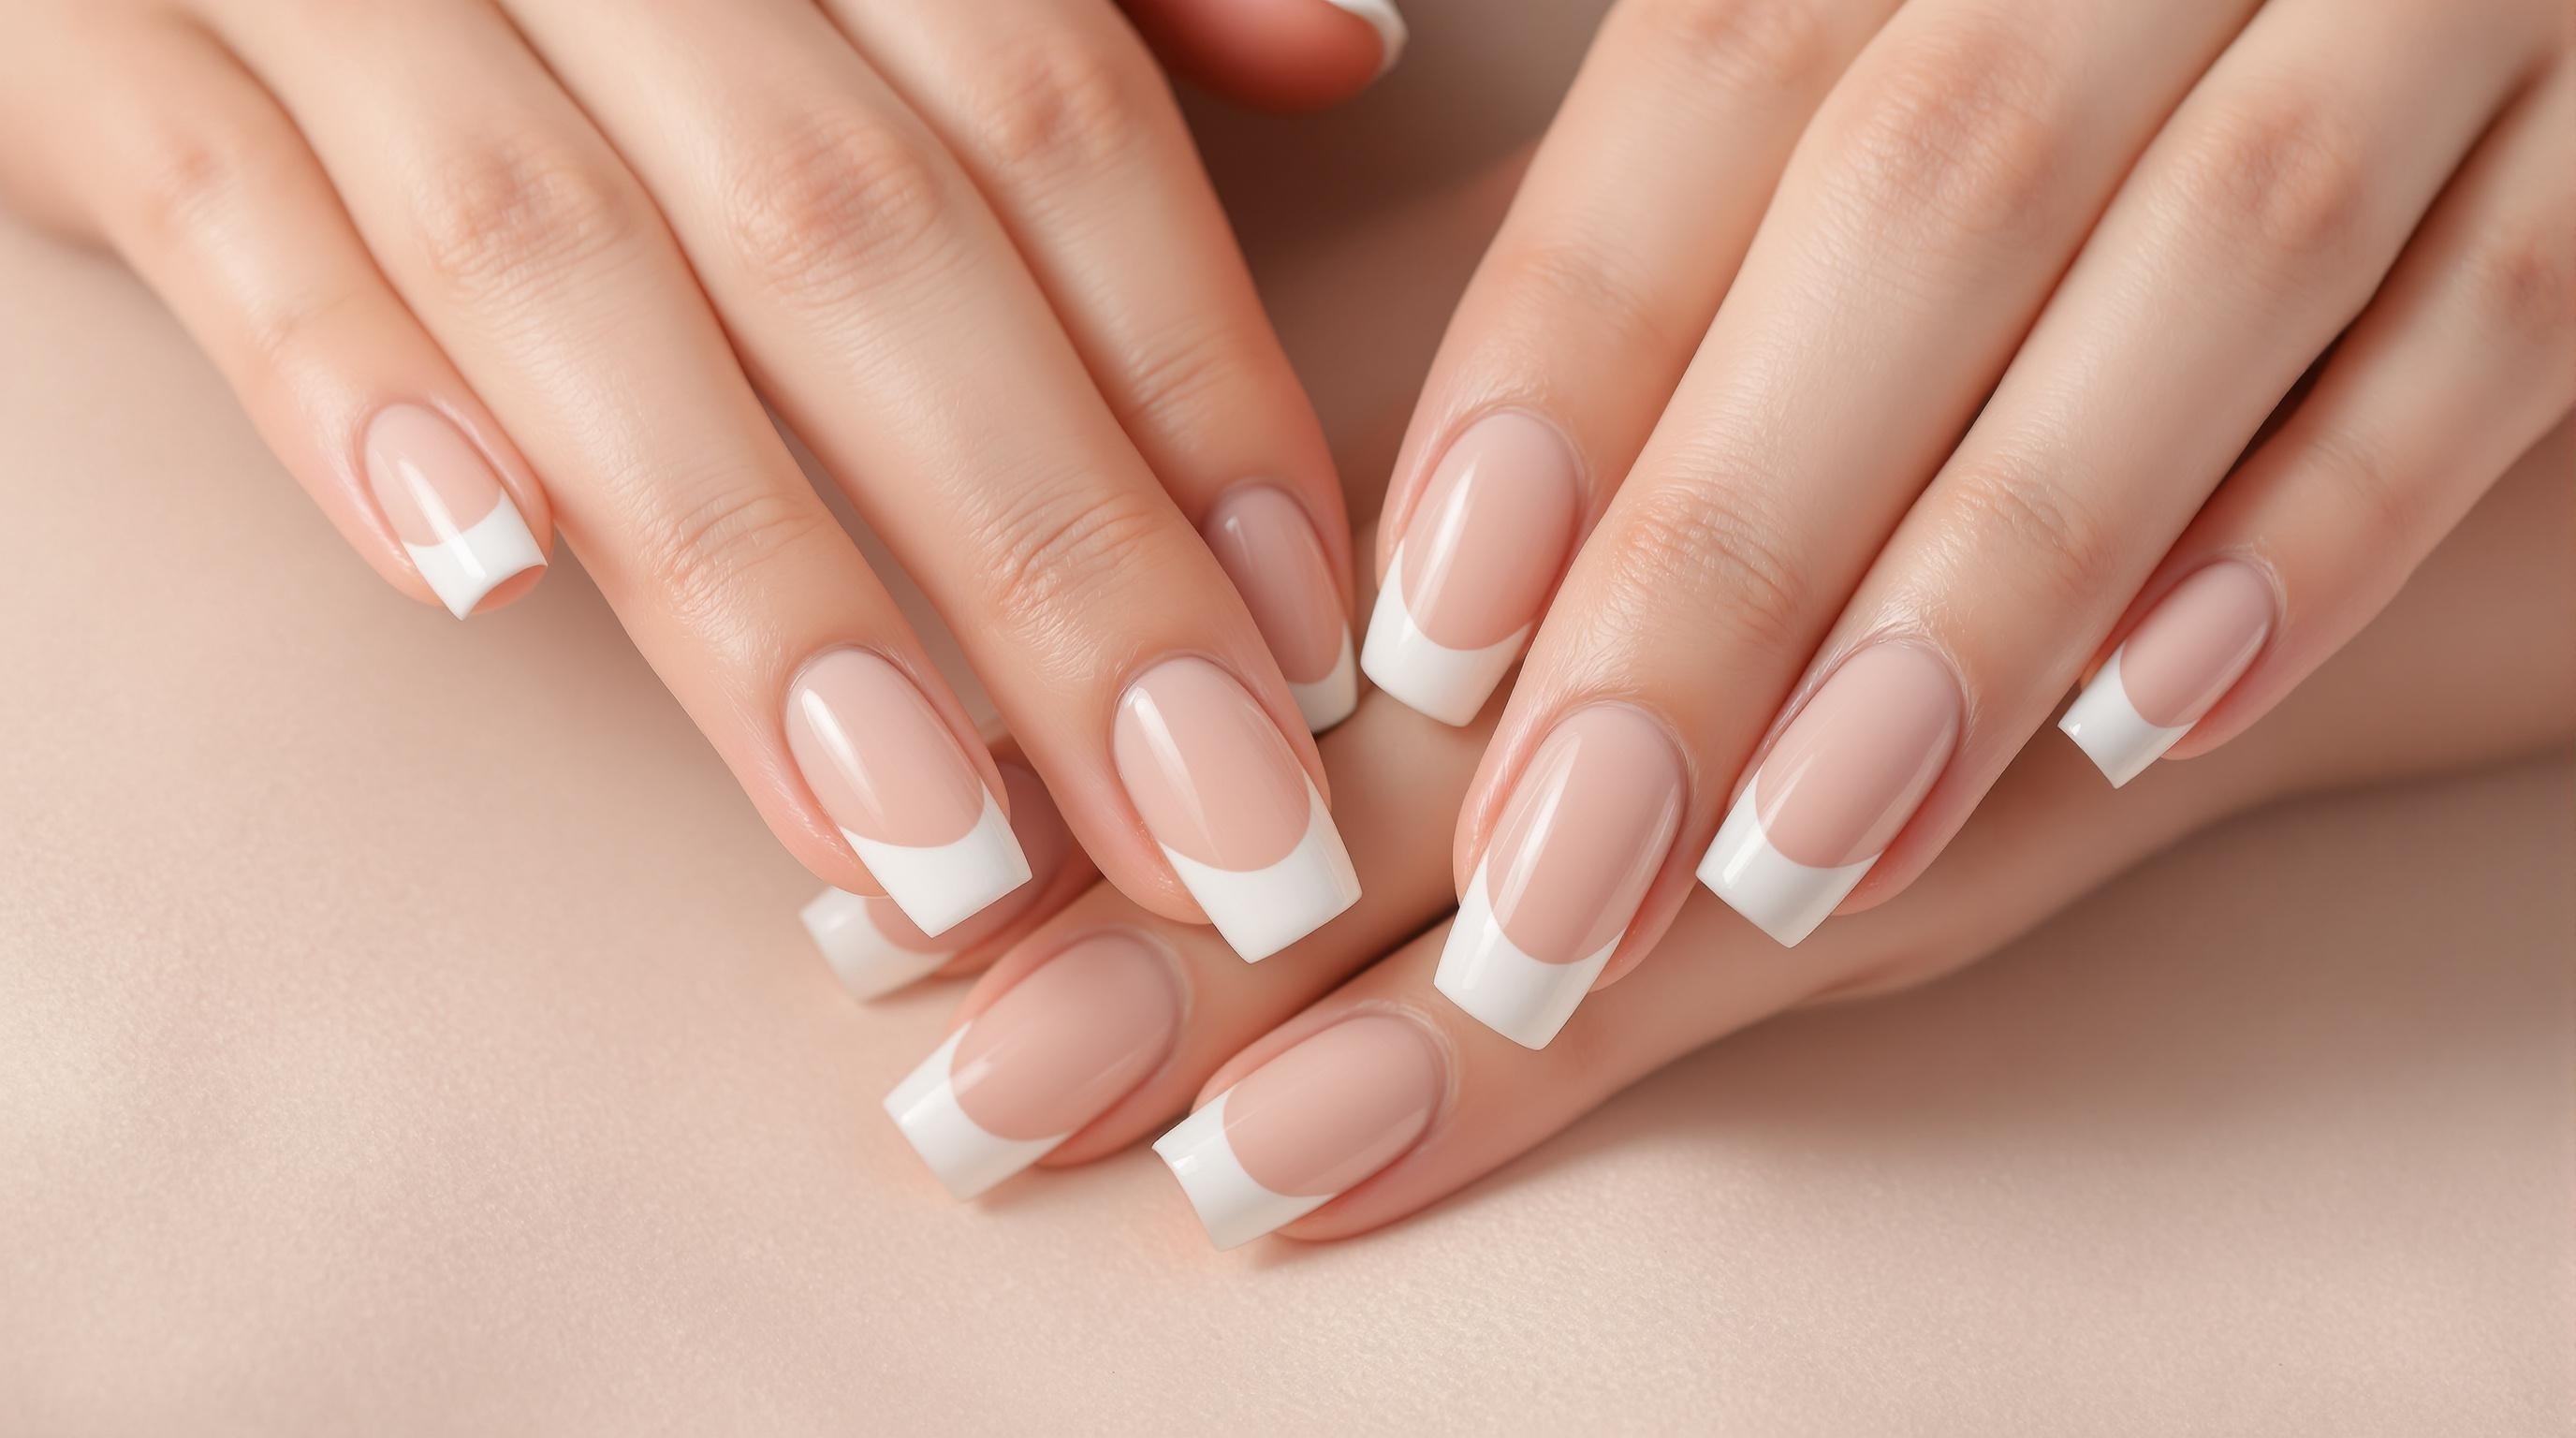
The coffin shape—with its tapered sides and flat tips—has become the canvas of choice for modern French tips. This shape offers the perfect balance of elegance and edge, providing enough space for creativity while maintaining a sophisticated silhouette. Celebrity nail artists have embraced this combination, propelling coffin French tips to the forefront of 2025's most requested nail designs.
Who This Guide Is For
This comprehensive guide caters to nail enthusiasts across all skill levels:
Beginners: If you're just starting your nail journey, you'll find clear, step-by-step instructions and troubleshooting tips to help you master the basics.
Intermediate: Already comfortable with basic techniques? Discover professional methods to elevate your skills and achieve salon-quality results.
Advanced: Even seasoned nail enthusiasts will find value in our trending techniques, innovative design ideas, and expert insights.
What Sets This Guide Apart from Others
Unlike most nail tutorials that only scratch the surface, this guide delves deep into every aspect of creating perfect coffin French tips. We've consulted professional nail technicians, analyzed trending designs across social media platforms, and compiled insider secrets to create the most comprehensive resource available. From nail prep to maintenance, from basic techniques to advanced artistry—we've covered it all in meticulous detail.
II. Understanding Coffin French Tip Nails: The Fundamentals
What Exactly Are Coffin Nails?
Coffin nails, also known as ballerina nails, feature a distinctive shape that tapers at the sides and ends with a flat, squared-off tip. The name comes from the shape's resemblance to a coffin or a ballerina's pointe shoe. This shape offers the length and drama of stiletto nails but with more practicality and stability for everyday wear.
The Evolution of French Tips on Coffin Nails
The French manicure originated in the 1970s but has undergone significant evolution. When applied to coffin nails, the traditional white tip takes on a new dimension. The flat edge creates a perfect canvas for the smile line (the curve where the white tip meets the natural nail color), while the tapered sides add an element of sophistication. Over the years, this combination has evolved from a basic white tip to include ombré effects, metallic finishes, and geometric variations.
Why This Combination Works So Well
The coffin shape and French tip technique complement each other perfectly for several reasons:
Visual Balance: The flat tip provides a clean, straight edge that beautifully frames the curved smile line.
Versatility: The combination works for both minimalist and elaborate designs.
Elongating Effect: The vertical lines of the coffin shape combined with the horizontal line of the French tip create an optical illusion that makes fingers appear longer and more slender.
Practical Elegance: The shape offers durability while maintaining a sophisticated appearance.
Ideal Nail Length and Natural Nail Health Requirements
While the coffin shape can be created on various nail lengths, it typically requires medium to long nails to fully showcase its distinctive features. For natural nails, a minimum free edge of 3-5mm is recommended before filing into a coffin shape. For those using extensions, the ideal length typically falls between 10-15mm from the fingertip, though this can be adjusted based on personal preference and lifestyle.
Regarding nail health, coffin French tips require:
Strong Natural Nails: The coffin shape puts stress on the sides of the nail, so natural nails should be healthy and not prone to splitting.
Proper Hydration: Well-moisturized cuticles and nail plates are essential for preventing breakage.
Regular Maintenance: The sharp angles of coffin shapes require consistent upkeep to maintain their distinctive appearance.
III. Essential Tools & Materials: Setting Yourself Up for Success
Professional-Grade vs. Beginner-Friendly Options
The quality of your tools directly impacts the outcome of your coffin French tips. While professional-grade tools offer precision and durability, they often come with a higher price tag. For beginners, there are budget-friendly alternatives that can still deliver satisfactory results. As you progress, gradually investing in better tools will enhance your technique and efficiency.
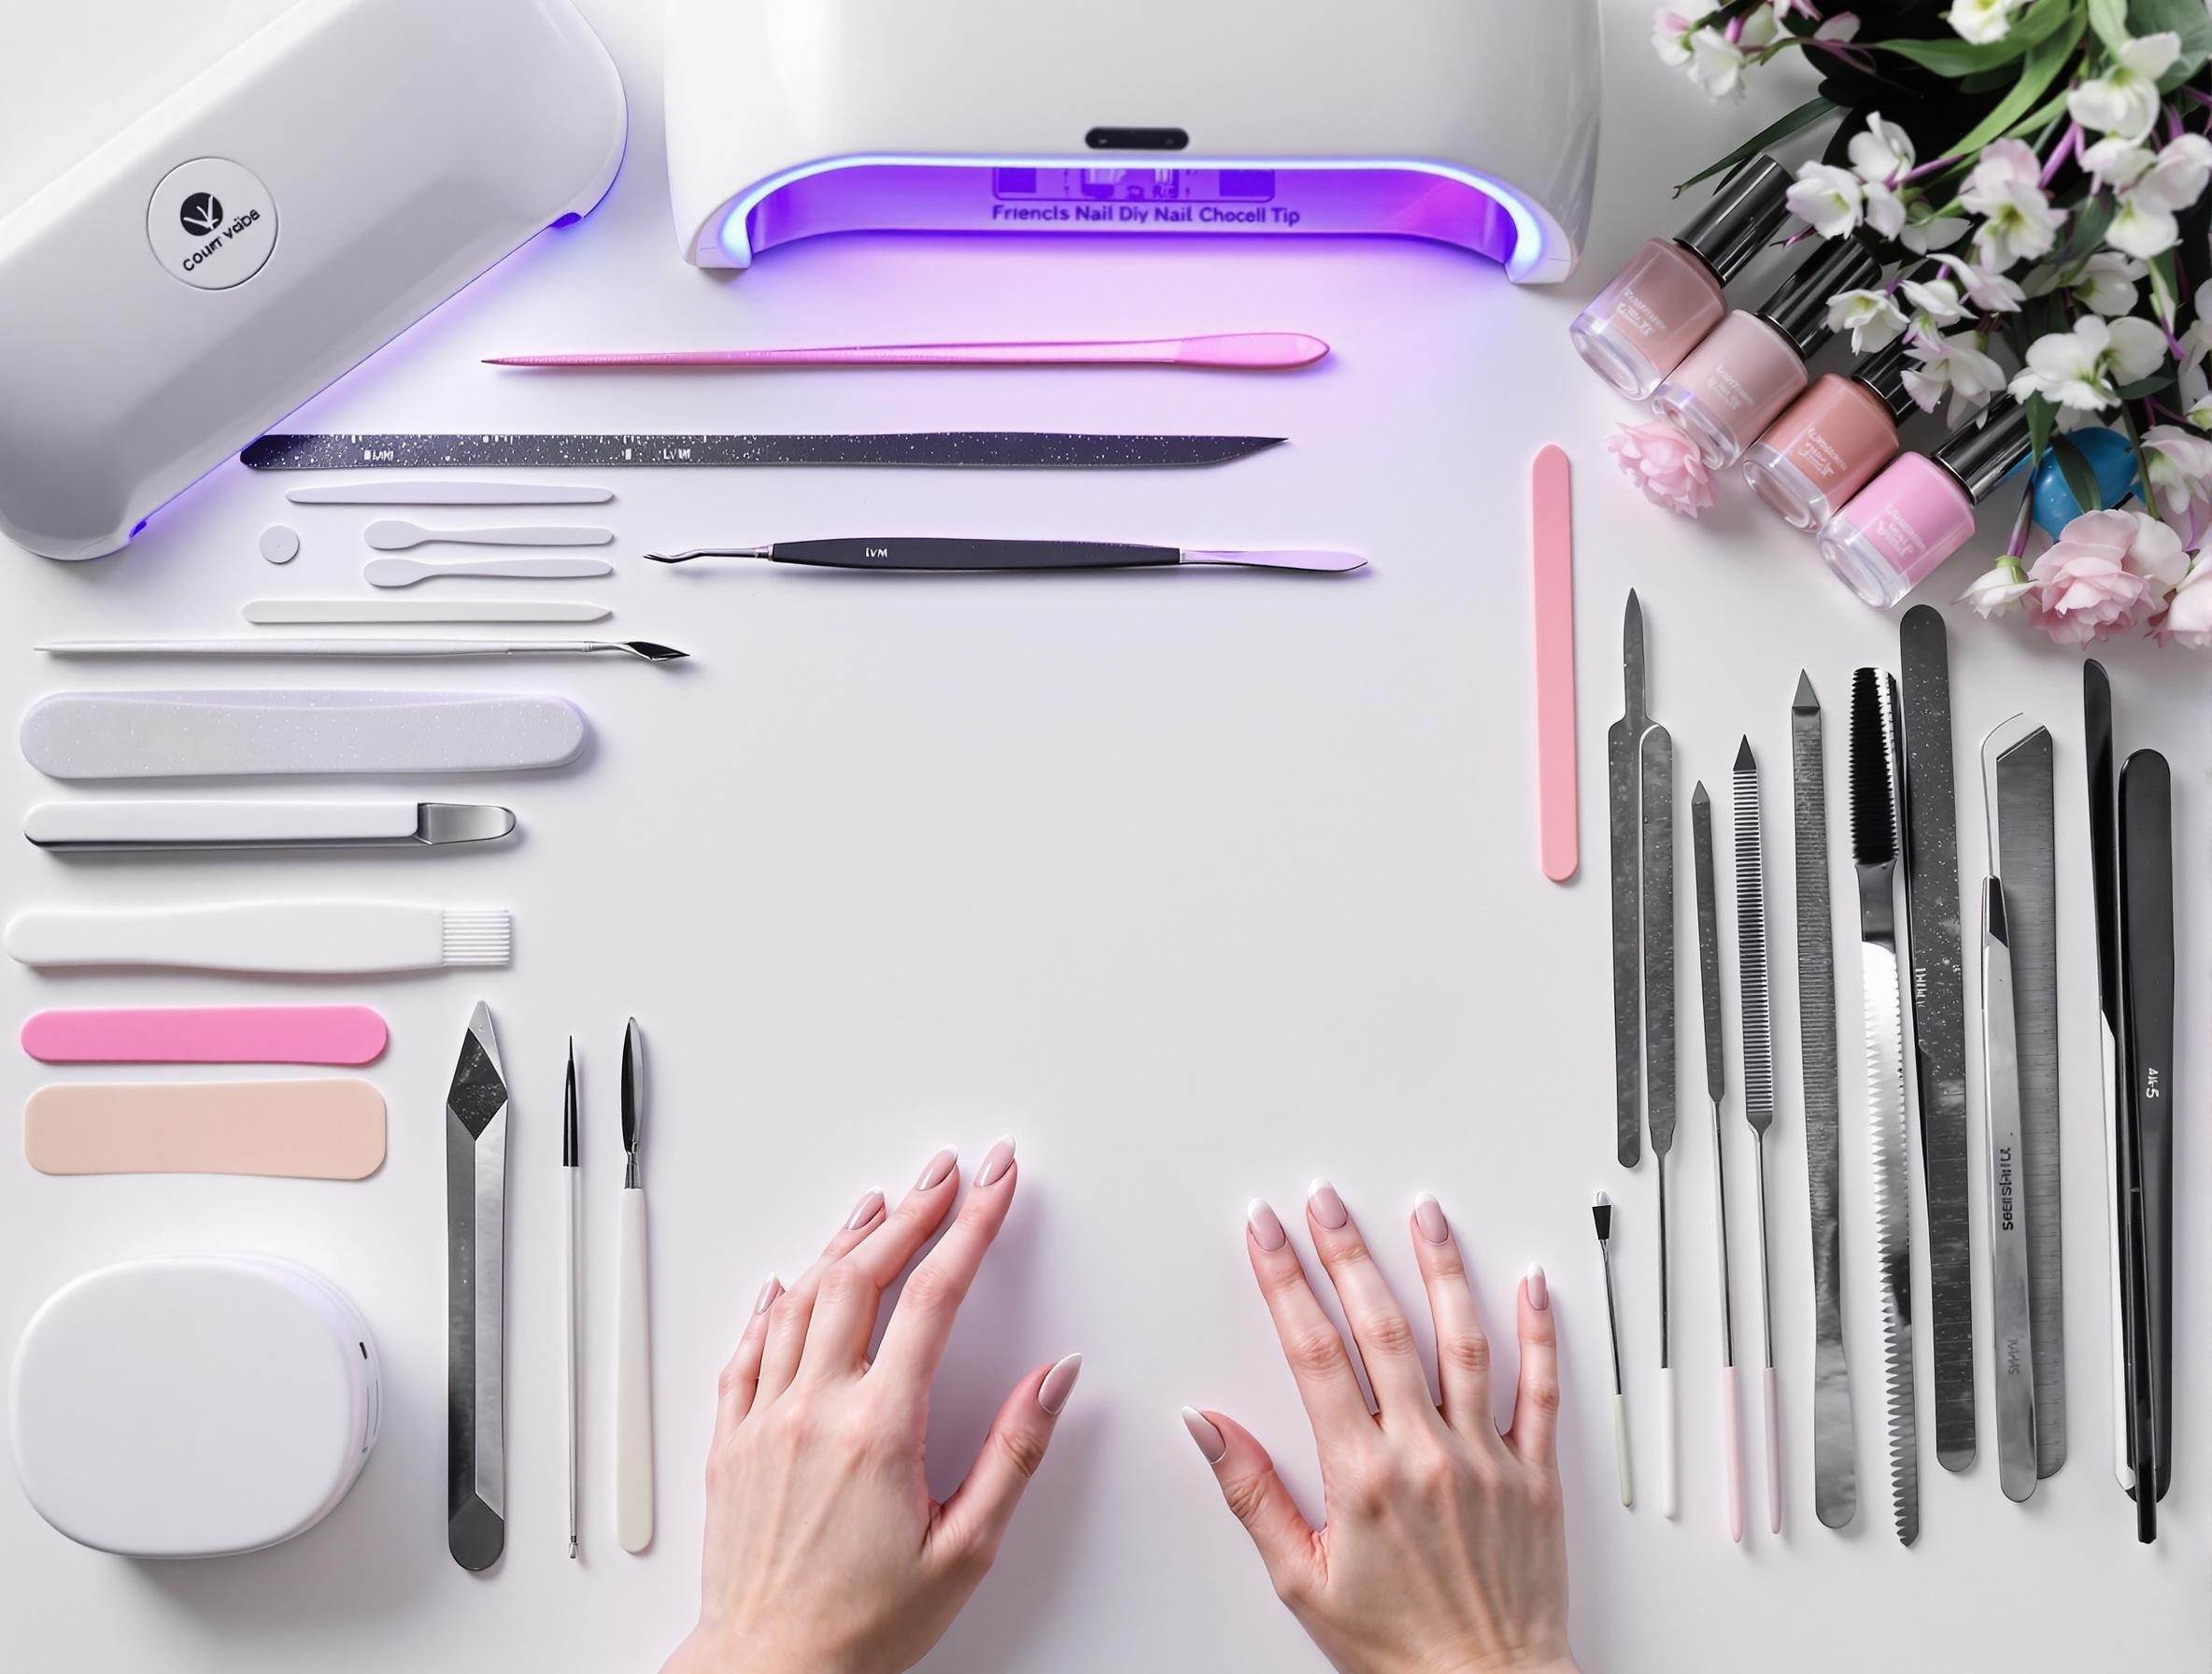
The Complete Shopping List
Base Materials
Nail Tips or Forms: Pre-shaped coffin tips or forms for building the extension
Nail Glue: Professional-grade adhesive for tips
Acrylic Powder and Liquid: For acrylic extensions
Builder Gel: For gel extensions (hard gel or polygel options)
Base Coat: To protect natural nails and enhance adhesion
White Gel/Polish: For the French tip (look for ones specifically formulated for French tips)
Pink/Nude Gel/Polish: For the nail bed color
Top Coat: To seal and add shine (no-wipe preferred for gel systems)
Specialty Tools
French Tip Guides: Adhesive stencils for creating perfect smile lines
French Tip Dip Container: For the dipping method of creating tips
Detail Brushes: Fine brushes (sizes 00-1) for precise smile lines
Silicone French Smile Line Tool: For stamping perfect curves
White Gel Paint: For detailed corrections and thin lines
Essential Tools
UV/LED Lamp: For curing gel products (minimum 36W recommended)
Nail Files: 100/180 grit for shaping, 180/240 grit for refinement
Buffer Block: For smoothing surfaces
E-file/Drill: For efficient shaping and prep (optional for beginners)
Cuticle Pusher and Nippers: For proper nail preparation
Nail Dehydrator and Primer: For maximum adhesion
Isopropyl Alcohol (99%): For cleaning and removing tacky layers
Lint-free Wipes: For clean application and removal
Premium Products Worth the Investment
Some tools justify their higher price tags through superior performance:
High-quality Nail File Set: Durable files with multiple grits last longer and provide more precise shaping
Professional UV/LED Lamp: Ensures even curing and reduces service time
Premium Detail Brushes: Make a significant difference in the precision of your smile lines
Professional-grade Gel Polish: Offers better pigmentation, application properties, and longevity
Budget-Friendly Alternatives That Deliver
Quality results are possible without breaking the bank:
Peel-off French Tip Guides: More affordable than silicone tools and still effective
All-in-one French Tip Kits: Beginner-friendly sets with essential components
Dual-ended Brushes: Offer versatility at a lower cost than individual brushes
Standard Nail Forms: Can be trimmed to create coffin shapes at a fraction of the cost of pre-shaped forms
Organizing Your Workspace for Efficiency
A well-organized workspace improves your efficiency and results:
Proper Lighting: A daylight lamp positioned correctly is essential for seeing details
Ergonomic Setup: Arrange tools within easy reach to prevent interrupting your flow
Clean Surface: Use a nail mat or towel that can be easily cleaned
Tool Organization: Keep brushes upright in holders and protect them from dust
Product Arrangement: Group products by usage order to streamline your process
Ventilation: Ensure proper airflow, especially when working with acrylics
IV. Nail Preparation: The Foundation of Perfect French Tips
Proper Natural Nail Care (Often Overlooked)
The quality of your coffin French tips begins with healthy natural nails. Many technicians rush through this crucial step, but proper preparation creates the foundation for a long-lasting manicure:
Thorough Cleansing: Remove all traces of polish, oils, and residue with a good quality nail cleanser.
Gentle Filing: Lightly buff the natural nail surface with a fine-grit buffer (240 grit or higher) to remove shine without thinning the nail.
Hydration Balance: While excessive oils must be removed for adhesion, nails should not be dehydrated to the point of brittleness. Use professional nail dehydrators rather than alcohol-based products.
Nail Plate Assessment: Identify and address any issues like ridges, peeling, or damage before applying products.
Cuticle Management Techniques for Clean Lines
Proper cuticle care is essential for professional-looking French tips and improved adhesion:
Gentle Softening: Apply cuticle remover and allow it to work for the recommended time (typically 30-60 seconds).
Pushing Back: Use a wooden or metal pusher with gentle pressure to push back softened cuticles.
Proximal Fold Cleaning: Carefully clean away any pterygium (the thin layer of cuticle that adheres to the nail plate).
Selective Trimming: Only trim loose, hanging cuticle tissue (never cut living tissue or the entire cuticle).
Side Wall Clearing: Ensure the sides of the nails are free from cuticle growth for clean application.
Nail Surface Preparation for Maximum Adhesion
Creating the optimal surface for product adhesion prevents lifting and extends wear time:
Remove Shine: Gently buff the nail plate to remove the natural shine without over-filing.
Dust Removal: Use a nail brush or dust-free wipe to completely remove filing dust.
Dehydration: Apply a professional nail dehydrator to remove moisture and oils.
pH Balancing: Use a pH balancer to optimize the nail surface for product adhesion.
Primer Application: Apply appropriate primer for your chosen system (acid-free for sensitive nails, acid-based for difficult adhesion cases).
Base Coat Selection: Choose a base coat formulated for your specific nail type (strengthening, flexible, ridge-filling).
Length and Shape Considerations for Your Hand Type
Customizing coffin nails to complement your hand shape creates a harmonious, flattering look:
Long, Slender Fingers: Can support more dramatic length and width. Consider a wider coffin shape with a slightly longer free edge.
Short Fingers: Opt for a more tapered coffin shape with moderate length to create the illusion of longer fingers.
Wide Nail Beds: A more pronounced taper on the coffin shape helps create a slimming effect.
Narrow Nail Beds: A gentler taper with a slightly wider free edge creates balance.
Active Lifestyle: Choose a shorter coffin length (often called "baby coffin") for practicality while maintaining the characteristic shape.
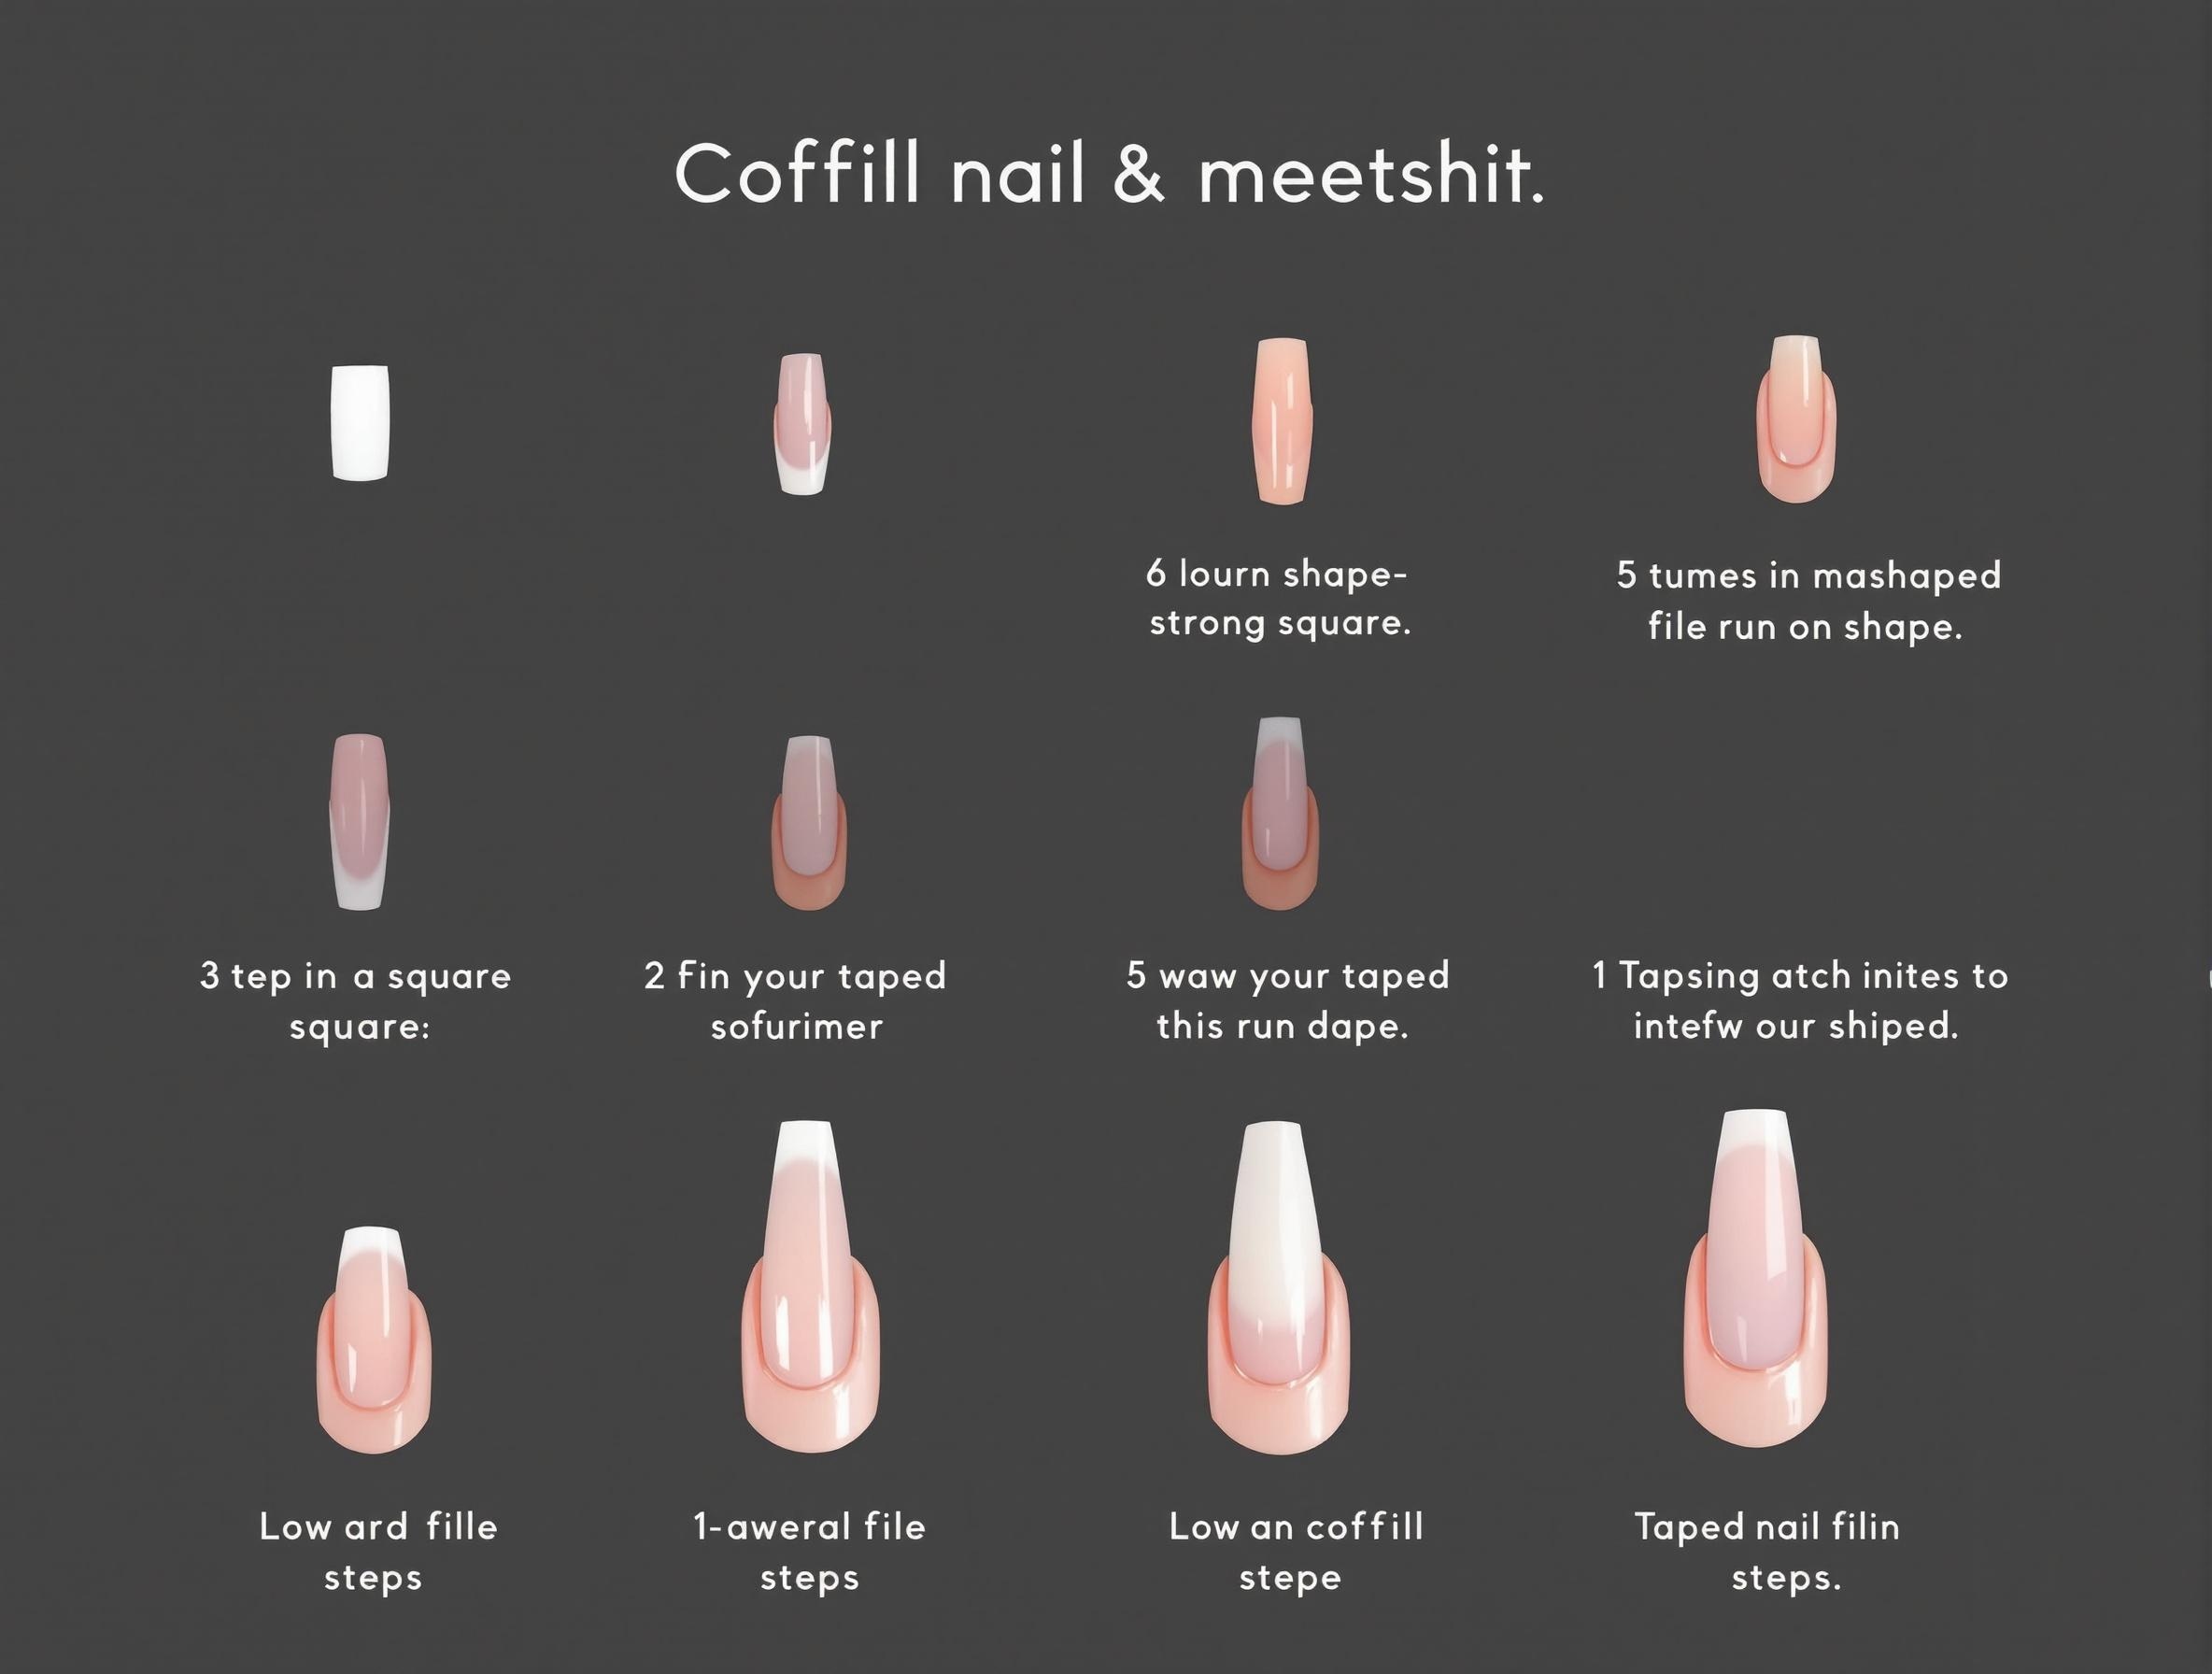
The Art of Creating the Perfect Coffin Shape
Mastering the distinctive coffin shape requires precision and symmetry:
Start Square: Begin with a square shape as your foundation.
Side Filing: Using a 180 grit file at a 45° angle, taper the sides toward the free edge.
Maintain Symmetry: Constantly compare both sides to ensure even tapering.
Free Edge: Keep the free edge straight across, not curved or pointed.
Refinement: Use a finer grit file (240+) to smooth any rough edges.
Consistency Check: View the nail from multiple angles to ensure the coffin shape is uniform.
Pro Tip: For perfect symmetry, file both sides toward the center rather than filing one side completely and then moving to the other.
V. Creating Basic Coffin French Tips: The Step-by-Step Process
Method 1: Traditional Brush Technique for Precision
The classic approach relies on steady hands and brush control:
Apply a thin layer of base color (typically nude or pink) and cure if using gel.
Select a thin detail brush dedicated to white gel/polish.
Start at one side of the nail, placing your brush where you want the smile line to begin.
With steady pressure, draw a curved line across to the other side.
Fill in the space between your smile line and the free edge.
Cure if using gel polish (if using regular polish, allow sufficient drying time).
Apply a second coat of white if needed for opacity and cure again.
Finish with top coat over the entire nail and cure.
Pro Tip: Rest your pinky finger on a stable surface to steady your hand while drawing the smile line. For beginners, start with a thinner smile line and gradually build confidence for deeper curves.
Method 2: Innovative Dipping Method for Clean Lines
This technique creates perfect smile lines with minimal brush skills required:
Apply base color and cure if using gel.
Pour white gel polish into a small dappen dish.
Hold your nail at approximately a 45° angle, with the free edge pointing downward.
Dip just the tip of the nail into the white gel, creating a natural curved line where the gel meets the nail.
Adjust the angle of your nail to create deeper or shallower curves as desired.
Clean any excess from the skin or cuticle area with a clean-up brush.
Cure under a lamp.
Apply a second dip if needed for opacity.
Seal with top coat and cure.
Pro Tip: Practice the angle of dipping on a nail wheel before trying on yourself or clients. The depth of the dip determines how deep your French tip will be.
Method 3: Using French Tip Guides and Tools
For consistent, perfectly shaped smile lines:
Apply base color and cure if using gel.
Select appropriate French tip guides for your nail size and shape.
Apply the guide, positioning it to create your desired smile line depth.
Press firmly to ensure no polish can seep underneath.
Apply white gel/polish to the exposed tip area.
Carefully remove the guide before curing gel (pull straight off to avoid smudging).
Cure the white tip.
Apply a second coat of white if needed for opacity and cure again.
Seal with top coat and cure.
Alternative: Silicone smile line stampers are another excellent tool. Load the curved edge with white gel, then gently press and roll onto the nail to create a perfect curve.
Method 4: The "Reverse" French Tip Technique
This method offers excellent precision for beginners:
Apply white gel/polish to the entire nail and cure.
Apply a second coat of white if needed for opacity and cure.
Using your chosen nude/pink color and a detail brush, create the smile line by painting the lower portion of the nail.
Cure the color.
Apply a second coat of nude/pink if needed for opacity.
Seal with top coat and cure.
Pro Tip: This method is excellent for those who find it easier to paint a curved line with their base color rather than white.
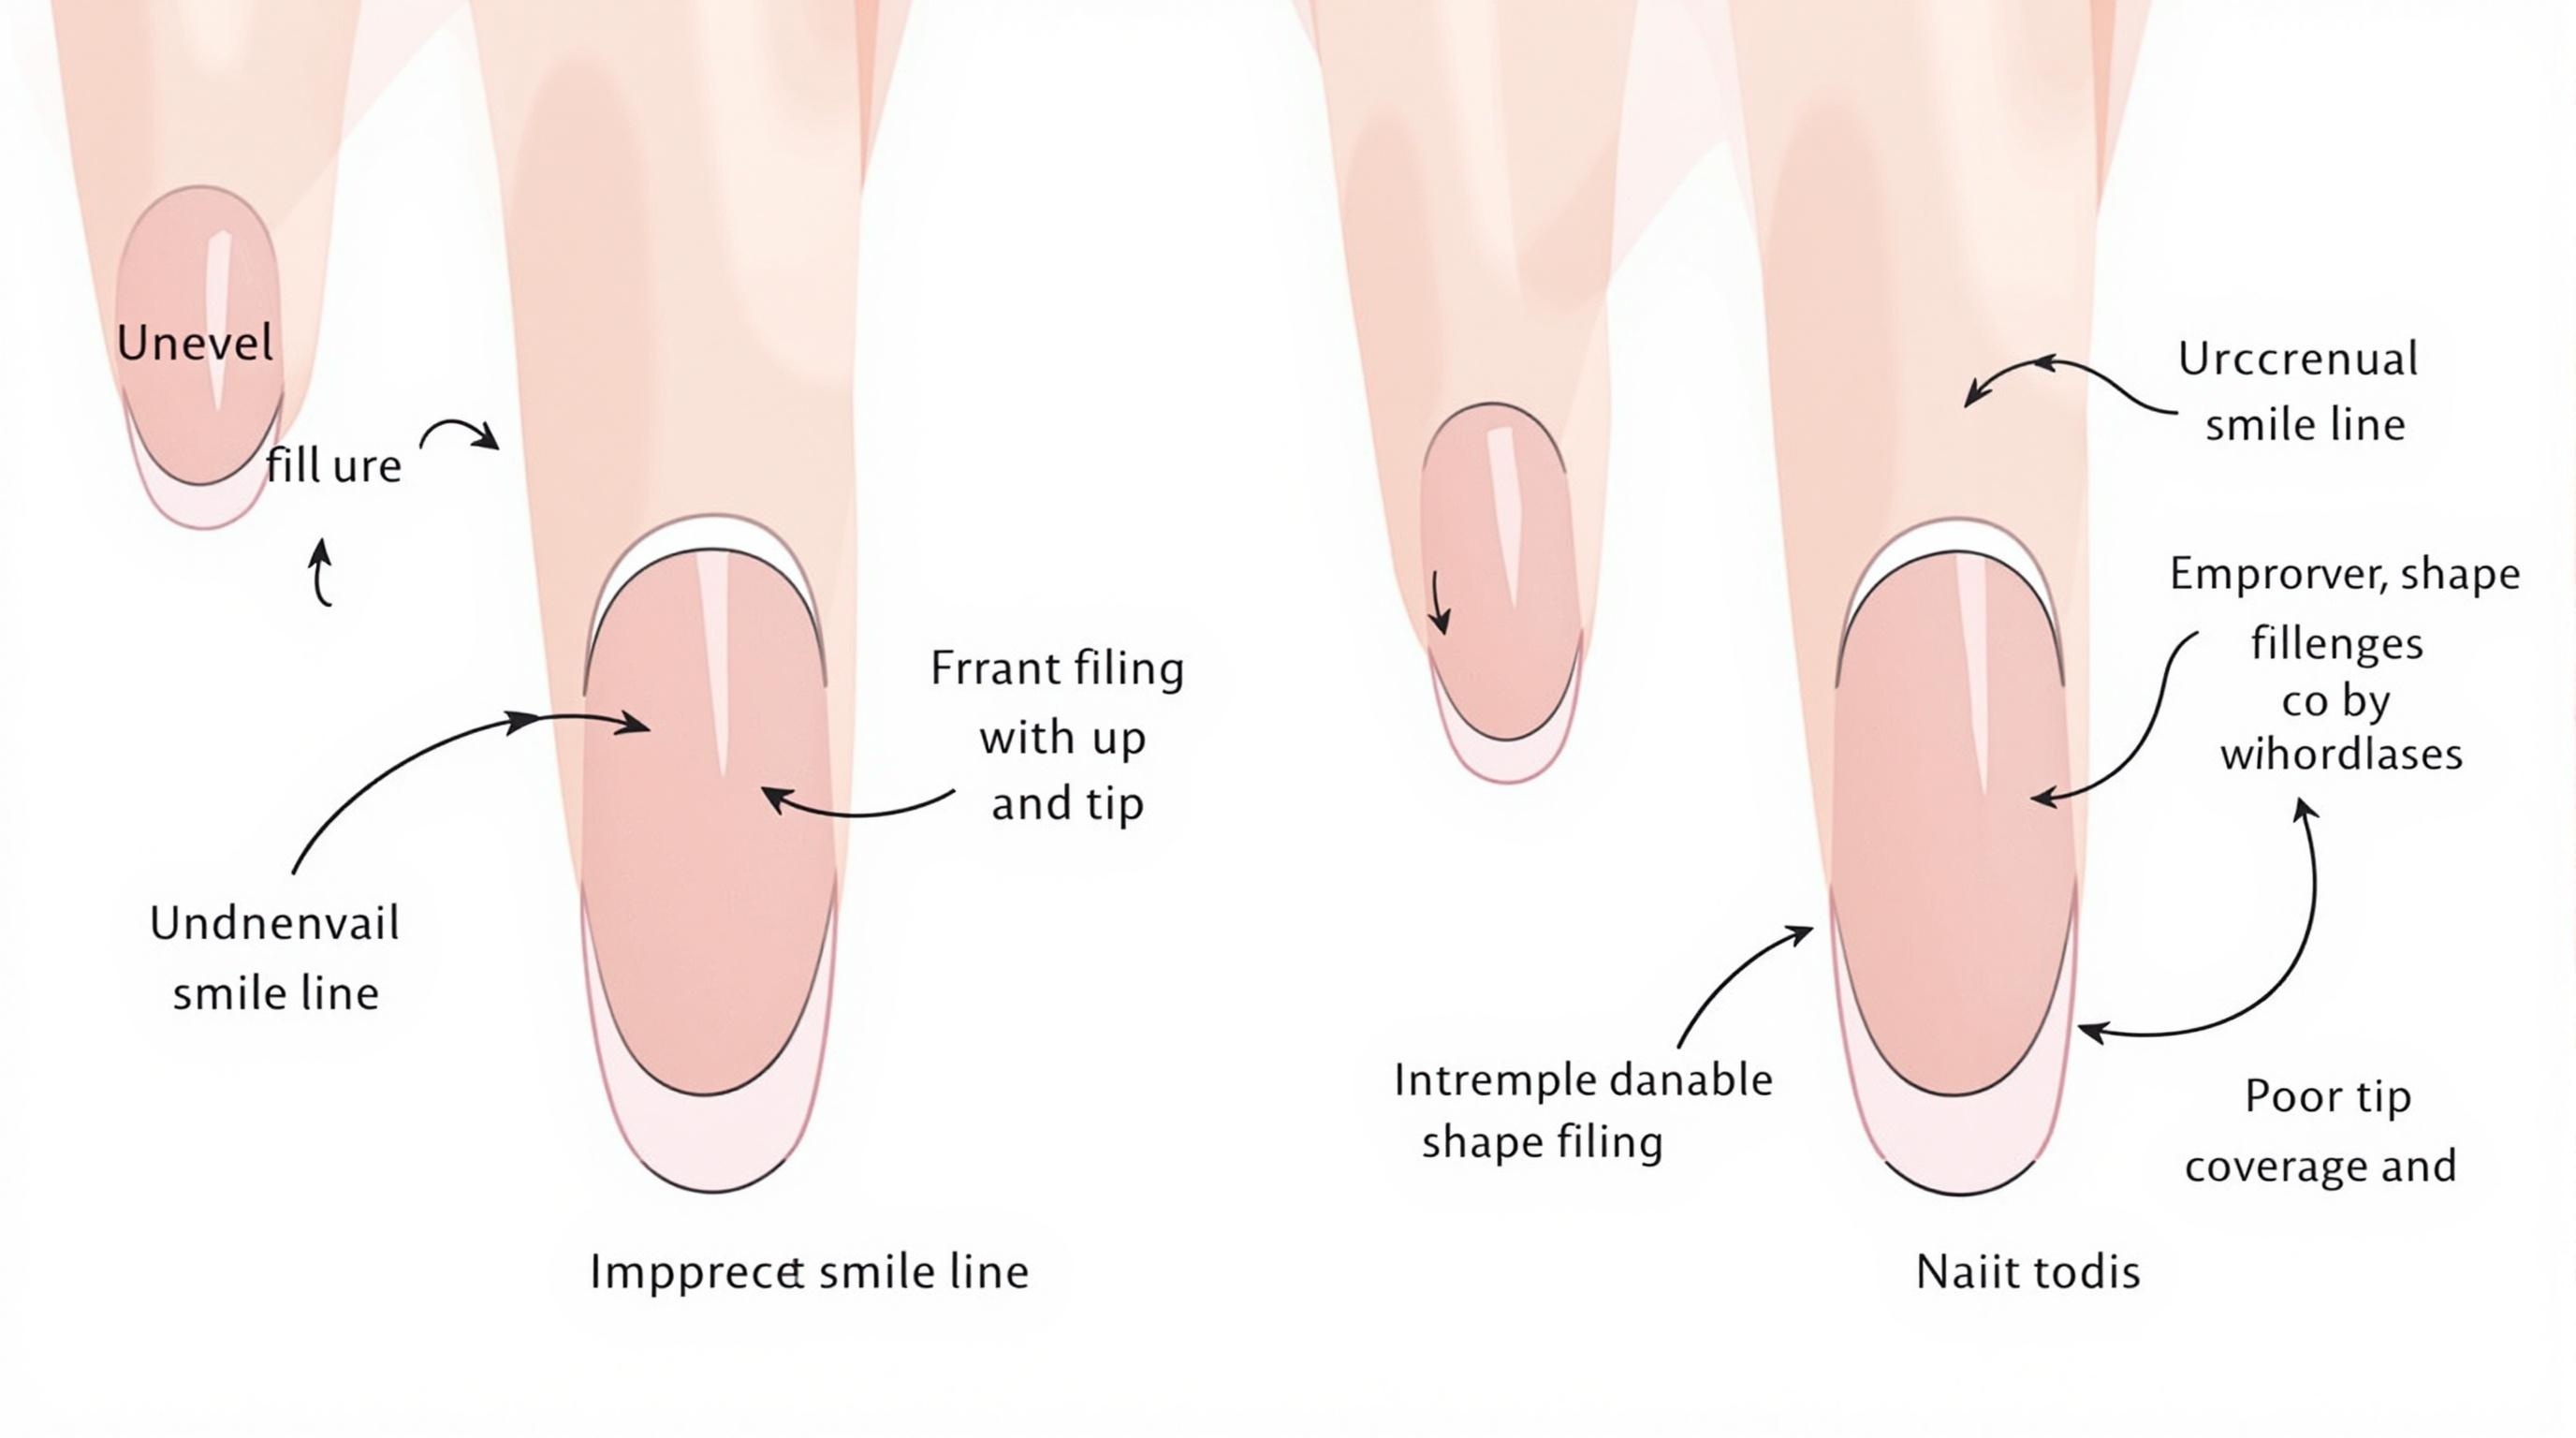
Troubleshooting Common Application Issues
Uneven Smile Line: Use a clean detail brush dipped in acetone (for regular polish) or alcohol (for gel) to clean and reshape before the product sets.
Streaky White Tips: The white polish may be too thick or too thin. Adjust consistency or try multiple thin layers instead of one thick layer.
Bleeding Color: Ensure your first layer is completely cured/dried before adding the second color, and use a lighter touch when applying product near the smile line.
Smudged Lines: Wait longer between removing guides and curing, or try flash-curing for a few seconds before removing guides.
Visible Ridge at Smile Line: Apply a thin layer of clear builder gel over the smile line and cure to smooth the transition.
VI. Advanced Techniques for Salon-Quality Results
Creating the Perfect Smile Line
The smile line is the defining feature of French tips. Here's how professionals create that perfect curve:
Custom Curve Mapping: Analyze each nail bed's natural shape and customize the smile line to complement it rather than using the same curve on every nail.
Shadow Technique: Create depth by applying a very thin line of soft pink or beige just below the white tip before applying the main nude color.
Precision Tools: Use a speciality French line brush (with longer bristles) that holds its shape while allowing flexibility for smooth curves.
Two-Step Application: First create an outline of the smile line, then fill in the tip for ultimate precision.
90° Holding Technique: Hold the brush perpendicular to the nail when drawing the smile line for optimal control.
Balancing Proportions for Your Nail Length
Professional nail artists understand that proportion is key to attractive French tips:
The Rule of Thirds: On longer coffin nails, the white tip typically occupies about 1/3 of the total nail length for classic proportions.
Short Nail Adaptation: For shorter nails, reduce the tip to 1/4 of the length to maintain elegance without overwhelming the nail.
Visual Elongation: Create a deeper smile line on the sides and a shallower curve in the center to visually elongate short or wide nail beds.
Lateral Balance: Ensure the smile line reaches the same height on both sides of the nail for symmetry.
Consistent Set Balance: Modify the depth of each smile line slightly across the hand to create a cohesive set while accounting for different nail bed shapes.
Gradient and Ombré French Tips (The 2025 Trend)
Modern French tips often feature gradient effects for a softer, more contemporary look:
Apply the base color and cure if using gel.
Create a smile line with white as usual and cure.
Using a makeup sponge or gradient brush, apply uncured white gel just below the smile line.
Before curing, use a clean brush to blend the white downward, creating a soft transition into the base color.
Cure the blended gradient.
Add a second layer of white to the tip only (not the gradient area) for opacity and cure.
Seal with top coat and cure.
Pro Tip: For colored ombré French tips, substitute white with any color of your choice, or create a dual-color gradient for dimension.
Working with Builder Gels for Strength and Longevity
Incorporating builder gels into your French tip application enhances durability:
Prepare the nail as usual and apply base coat.
Apply a thin layer of clear builder gel over the entire nail and cure.
Apply pink/nude builder gel to the nail bed area, leaving the free edge clear.
Apply white builder gel to create the French tip.
Before curing, use a brush dipped in slip solution to perfect the smile line.
Cure the entire nail.
Apply a thin layer of clear builder gel over the entire nail for structure.
Shape and refine with files after curing.
Finish with gel top coat and cure.
Pro Tip: Builder gel creates a smoother, more durable finish than regular gel polish and helps reinforce the free edge of coffin nails, reducing the risk of breaks.
Encapsulation Techniques for Dimensional French Tips
Create stunning visual effects by encapsulating materials within your French tips:
Prepare nails and apply base as usual.
Apply a thin layer of clear builder gel and cure.
Create your French tip design with white gel.
While the white tip is still uncured, apply encapsulation materials (such as glitter, dried flowers, or foil) precisely where desired.
Cure to set the design and materials.
Apply a layer of clear builder gel over the entire nail to encapsulate the design.
Shape and refine with files after curing.
Seal with top coat and cure.
Creative Options for Encapsulation:
Metallic foil just along the smile line
Fine glitter gradient within the white tip
Dried baby's breath flowers in the nail bed area
Sheer colored film over the white tip for a translucent colored French look
VII. 2025's Hottest Coffin French Tip Trends and Variations
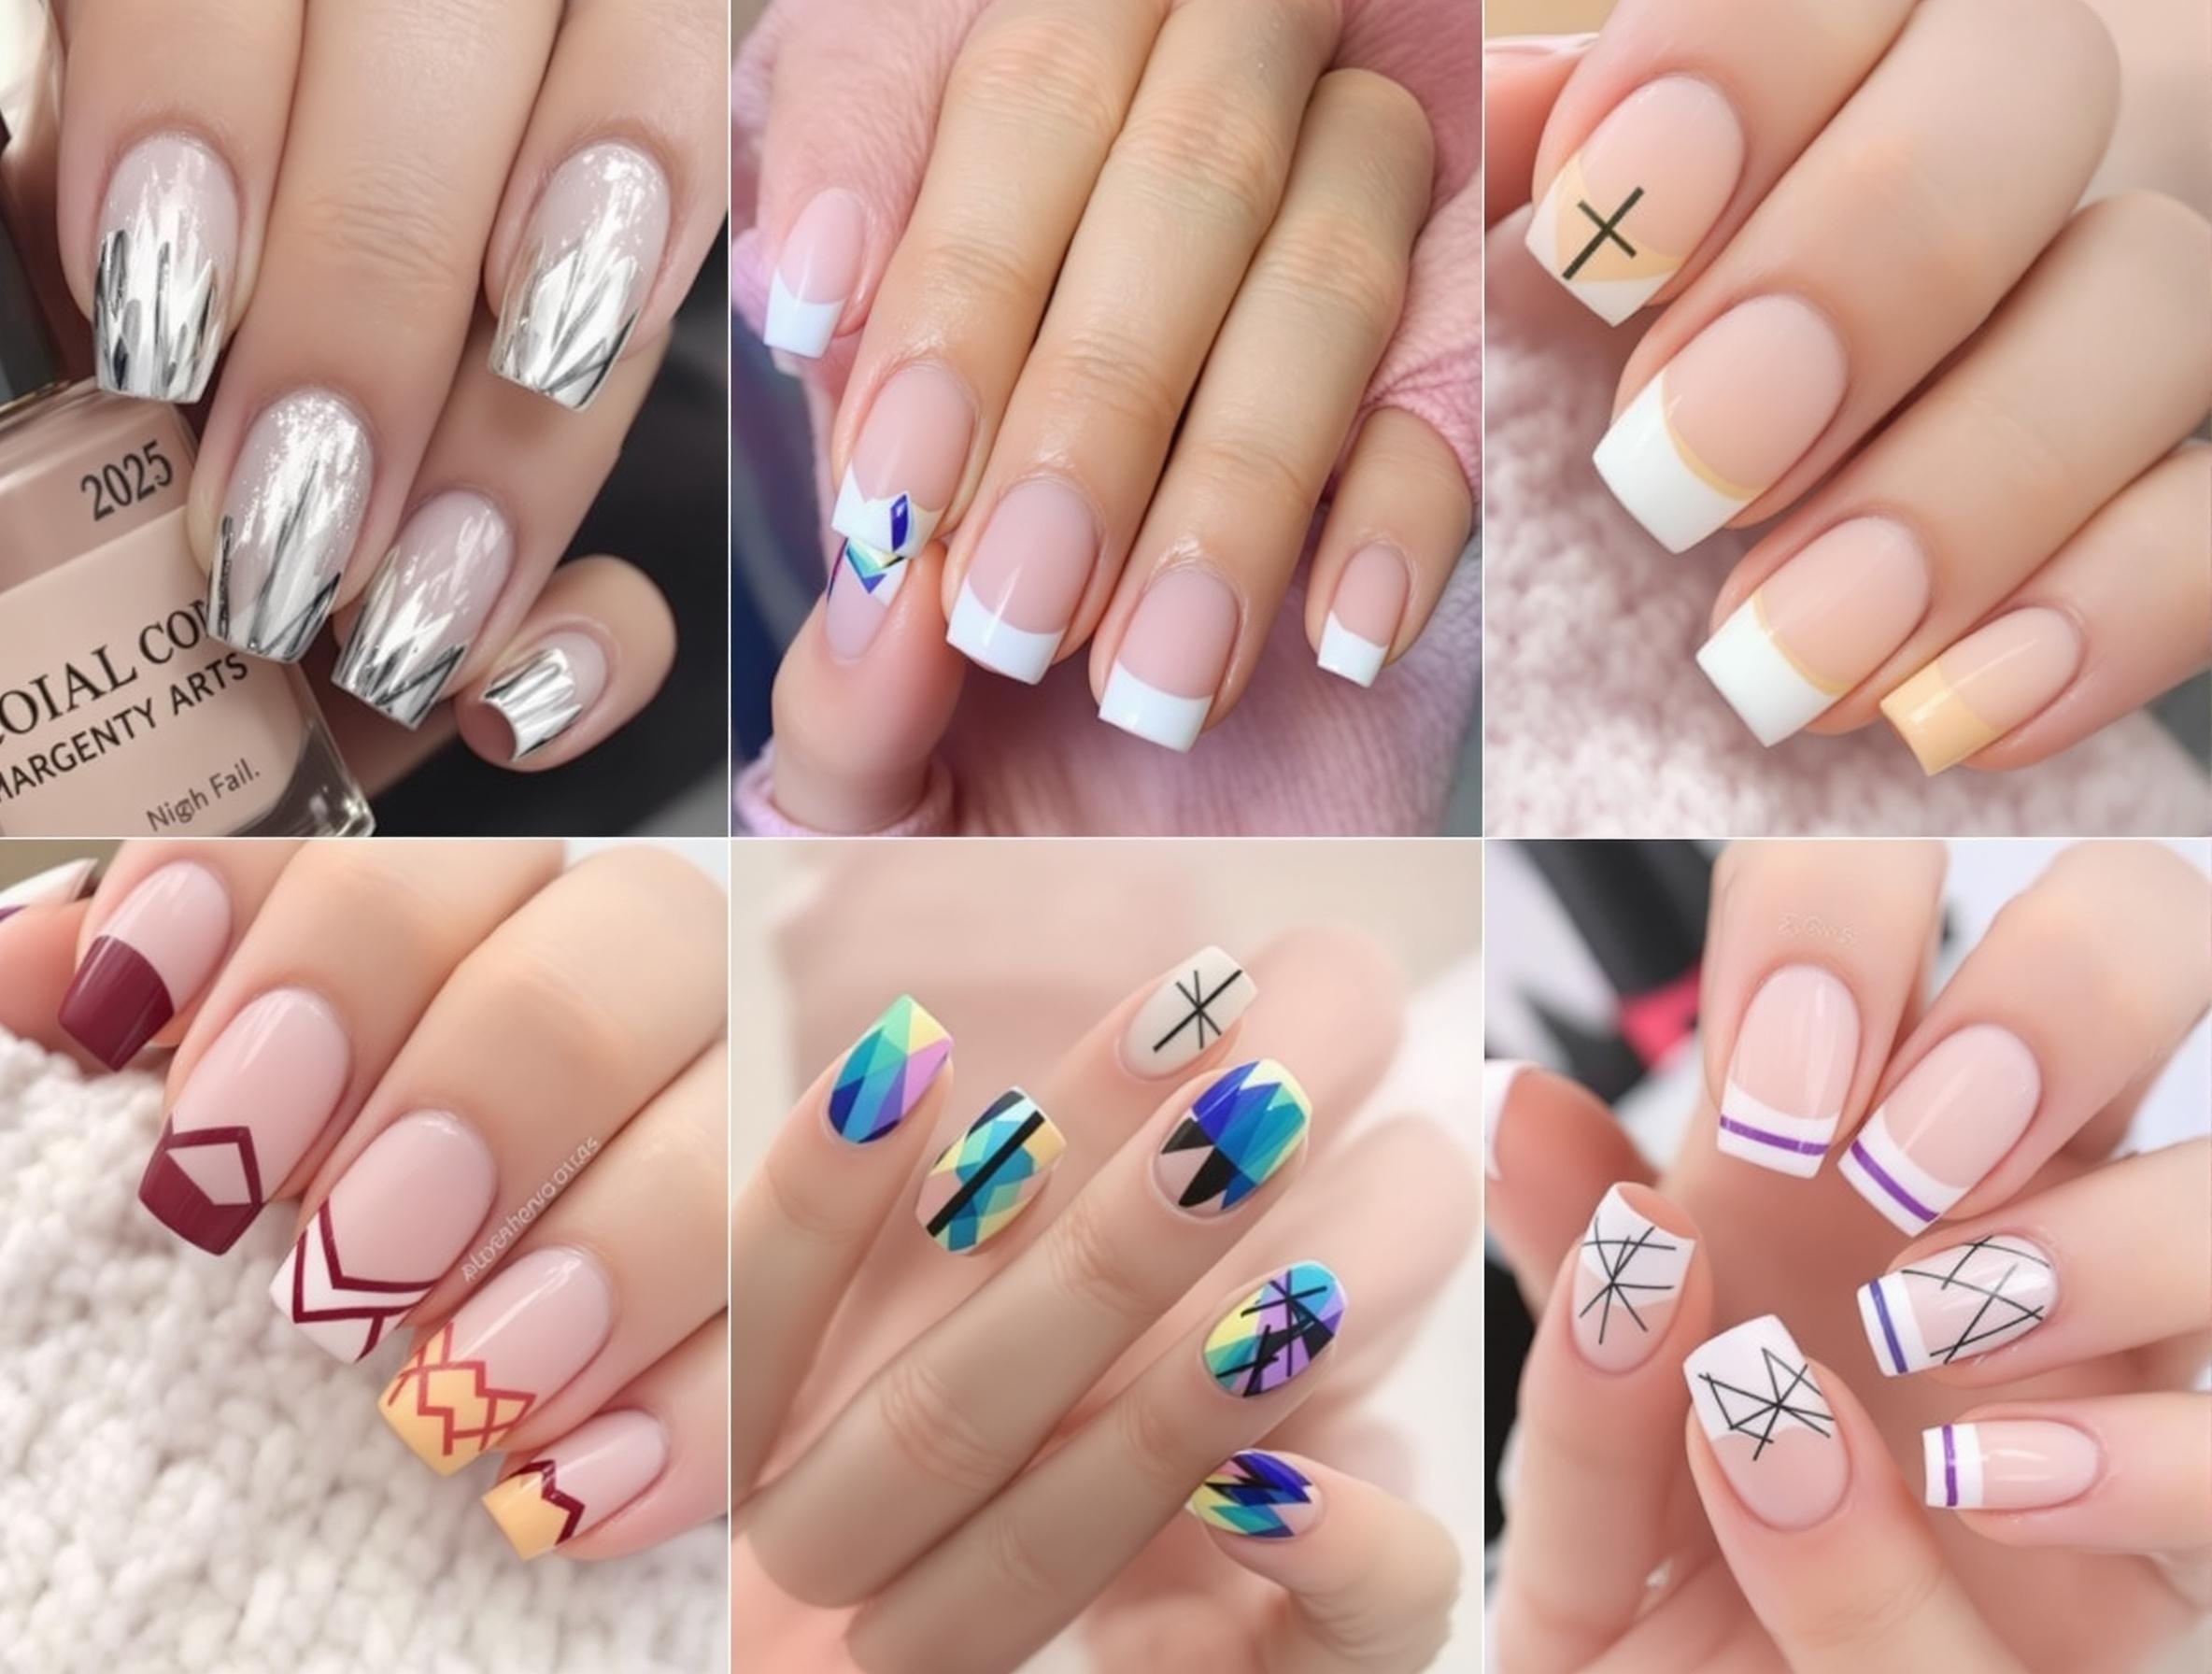
Chrome and Metallic French Tips (The Luxury Trend)
Chrome and metallic finishes are dominating high-end nail salons in 2025, offering a luxurious twist on classic French tips:
Application Technique: Create a traditional French tip with white or colored gel polish. After curing, apply chrome powder only to the tip portion using an eyeshadow applicator. Seal with a no-wipe top coat designed for chrome finishes.
Popular Variations:
Rose gold chrome tips on nude base
Gunmetal chrome tips on black base
Mirror chrome tips on clear base for a modern glass effect
Dual-chrome powders that shift colors depending on viewing angle
Celebrity Inspiration: This trend gained popularity after being featured on numerous red carpets, with celebrities pairing chrome French tips with minimalist fashion statements.
Minimalist Micro-French Tips (The Subtle Statement)
Micro-French tips feature ultra-thin lines that create an elegant, understated look:
Application Technique: Using the finest detail brush available (typically 00 or finer), create an extremely thin white line precisely at the edge of the nail. The line should be no more than 1mm in width.
Variations:
Double micro-lines with a small gap between them
Negative space micro-French with clear base
Asymmetrical micro-French with varying depths around the nail
Colored micro-lines in pastel or neon shades
Best For: Professional environments, minimalist aesthetics, and those who prefer subtle nail art. The thin line elongates fingers without drawing excessive attention.
Glow French Nail Trend (The Celebrity Favorite)
This innovative trend incorporates luminescent and glow-in-the-dark effects:
Application Technique: Apply a traditional French tip, then mix glow powder with clear gel and apply it over the white tip. When exposed to light and then viewed in darkness, the tips glow with an ethereal effect.
Popular Options:
Blue glow effect over white tips
Multi-color glow powder for rainbow effect in darkness
UV-reactive tips that change color under blacklight
Subtle daytime pearl effect that transforms to vibrant glow at night
Event Appeal: These designs have become particularly popular for nightlife events, festivals, and destination vacations where lighting conditions vary.
Geometric and Asymmetrical French Tips
Breaking away from traditional curves, these modern interpretations feature bold lines and shapes:
V-French: Instead of a curve, create a sharp V-shape at the center of the nail.
Diagonal French: Angle the line from one corner of the nail to midway down the opposite side.
Split French: Divide the tip into two colors with a clean line between them.
Triangular Sections: Replace the traditional curve with a series of connected triangles.
Architectural French: Create step-like structures or geometric patterns within the French tip area.
Application Technique: Vinyl tape or stencils can help create precise geometric lines. Alternatively, use a striper brush after practicing the design on paper.
Color Theory: Beyond White Tips
2025 embraces creative color combinations for French tips:
Monochromatic French: Use a darker shade of your base color for the tip (e.g., light pink base with deep pink tip).
Complementary Colors: Pair colors opposite on the color wheel for striking contrast (e.g., pale blue base with coral tip).
Seasonal Palettes:
Spring 2025: Sage green tips on cream base
Summer 2025: Terracotta tips on peach base
Fall 2025: Amber tips on caramel base
Winter 2025: Navy tips on grey-blue base
Dual-Tone Tips: Create an ombré effect within just the tip portion, transitioning between two colors.
Transparent Colored Tips: Using sheer colored gel over white creates a frosted, translucent colored tip.
Adding Dimension with Crystals, Pearls, and 3D Elements
Textural elements elevate French tips to statement pieces:
Crystal Smile Line: Place tiny crystals along the curve of the smile line for a sparkling border effect.
Pearl Accents: Embed micro pearls within the white tip or clustered at one corner.
3D Gel Art: Create raised designs with builder gel just on the tip portion.
Mixed Media: Combine different elements like metallic studs, dried flowers, and textured powders.
Placement Techniques:
Gradient density (more concentrated to more sparse)
Asymmetrical clustering on just 1-2 feature nails
Framing the entire perimeter of the nail
Creating specific patterns with precisely placed elements
Application Tip: Use a wax pencil or tacky gel to easily pick up and place small embellishments with precision.
VIII. Common Mistakes and How to Avoid Them
Top 5 Beginner Errors When Creating Coffin French Tips
1. Incorrect Filing Angles for True Coffin Shape
The Mistake: Filing the sides at inconsistent angles, resulting in asymmetrical tapering that looks unbalanced.
How to Avoid It:
Use a nail form as a guide to visualize the coffin shape before filing.
Mark the center point of the free edge with a small dot as a reference point.
File at a consistent 45° angle on both sides.
Frequently view the nail from multiple angles to check symmetry.
File both sides alternately in small amounts rather than completing one side fully before moving to the other.
2. Uneven Smile Lines and How to Fix Them
The Mistake: Creating smile lines that are asymmetrical, wobbly, or at different heights on each side of the nail.
How to Avoid It:
Practice smile lines on paper or nail tips before working on actual nails.
Use French tip guides or stickers for consistent curves until you develop steady hands.
Create the smile line in one fluid motion rather than stopping and starting.
Fix mistakes immediately with a fine clean-up brush dipped in alcohol or acetone.
For severe asymmetry, apply a thin layer of base color over the entire nail and start fresh.
3. Improper Curing Times Leading to Lifting
The Mistake: Under-curing gel products, especially at the free edge, resulting in service breakdown and premature lifting.
How to Avoid It:
Always follow the manufacturer's recommended curing times.
Cure white tips for an additional 30 seconds, as white pigment can inhibit curing.
Position nails correctly under the lamp, ensuring the free edge receives direct light.
Replace UV/LED bulbs according to manufacturer recommendations.
Apply thinner layers that cure more thoroughly rather than thick layers.
4. Neglecting Edge Capping for Durability
The Mistake: Failing to seal the free edge, which leaves the tip vulnerable to water absorption, lifting, and breakage.
How to Avoid It:
Cap the free edge with every layer of product applied (base coat, color, top coat).
Use the brush to wrap product around the edge and slightly underneath.
Pay special attention to the corners of coffin shapes, which are particularly vulnerable.
After filing, apply an additional thin layer of top coat specifically focused on sealing the free edge.
5. Using the Wrong Brush Size for French Tips
The Mistake: Attempting to create precise smile lines with brushes that are too large, too soft, or improperly shaped.
How to Avoid It:
Invest in a proper French tip brush (typically a thin, firm brush with a slight angle).
Keep separate brushes for white and colored products to prevent contamination.
Clean brushes thoroughly between applications.
Consider Japanese detail brushes specifically designed for nail art precision.
Replace brushes that have lost their shape or have splayed bristles.
Real-Time Correction Strategies for Salvaging Mistakes
Even professionals make mistakes. Here's how to fix them without starting over:
Wobbly Smile Line: Use a clean brush dipped in alcohol to reshape before curing. Alternatively, use white gel paint to refine and perfect the curve after curing.
Product Flooding Cuticles: Before curing, use an orangewood stick wrapped in a lint-free wipe to quickly clean the cuticle area.
Uneven White Coverage: Apply white gel to sparse areas only, then blend edges with a clean brush for seamless integration.
Dents or Divots: Apply a small amount of builder gel to the affected area, self-level, and cure.
Asymmetrical Coffin Shape: Add a small amount of builder gel to insufficient areas, cure, and reshape.
Air Bubbles: Pierce with a fine needle before curing, or apply a thin layer of clear gel over affected areas after curing.
Prevention Practices That Save Time and Frustration
Set yourself up for success with these preventative strategies:
Create a Template: For consistent smile lines across all nails, make a paper template matched to each nail's curvature.
Practice Progression: Master straight French tips before attempting curved ones, and perfect standard French before attempting coffin shapes.
Proper Lighting: Ensure your workspace has bright, shadowless lighting to spot imperfections before curing.
Test Products Together: Not all gel brands are compatible. Test your combination of base, color, and top coat on a sample tip before applying to clients.
Clean Brushes Between Steps: Residue from previous colors can affect application precision.
Stabilize Your Working Hand: Rest your pinky on a stable surface to minimize shaking during detail work.
Client Preparation: Advise clients to avoid lotions or oils before appointments, as residue interferes with adhesion.
IX. Maintaining Your Coffin French Tips
Weekly Maintenance Schedule for Long-Lasting Results
A consistent maintenance routine significantly extends the life of your coffin French tips:
Daily Care:
Apply cuticle oil morning and night to maintain flexibility and prevent lifting
Wear gloves during cleaning or chemical exposure
Avoid using nails as tools for opening packages or scratching surfaces
Every 2-3 Days:
Apply a thin layer of top coat to the free edge to reinforce the seal
Gently buff any rough spots with a fine buffer (240 grit or higher)
Check for early signs of lifting and address immediately
Weekly:
Deep condition cuticles with an intensive oil treatment
Inspect smile lines for wear or discoloration
Check coffin shape for any asymmetry developing from wear
Apply a fresh layer of top coat over the entire nail if using gel system
Bi-Weekly:
Schedule fill appointments for natural growth maintenance
Assess if tip color needs refreshing or reapplication
Consider a shape refinement to maintain crisp coffin edges
Touch-Up Techniques Between Full Applications
Address minor issues without a complete removal and reapplication:
Minor Tip Chips:
Gently buff the chipped area to smooth edges
Apply white gel polish precisely to the chipped area
Cure, then cover with top coat and cure again
If necessary, reshape the free edge to maintain symmetry
Smile Line Touch-Ups:
Use white gel paint to carefully redefine blurred smile lines
Apply with the finest detail brush available
Cure and seal with top coat
Lifting at Free Edge:
Gently buff the lifted area to remove any debris
Apply a small amount of builder gel under the lifted edge
Press down firmly to remove air bubbles
Cure and finish with top coat
Top Coat Refresher:
Lightly buff the entire nail surface to remove shine
Wipe with alcohol to remove dust
Apply a fresh layer of top coat and cure
Pay special attention to capping the free edge
Strategic Growth Management for Natural Nails
Managing regrowth is crucial for maintaining the appearance and structure of coffin French tips:
Fill Timing: Schedule fills every 2-3 weeks, depending on your natural nail growth rate. Waiting too long creates stress at the line where growth meets enhancement.
Backfill Technique:
Carefully file down the outgrown area with an e-file or hand file
Push back and clean cuticles
Apply primer to the natural nail growth
Fill with builder gel or acrylic that matches your base color
Blend seamlessly into the existing enhancement
Reshape if necessary and redefine the smile line
Growth Line Disguise: If you can't get to a fill appointment, apply a thin layer of matching nude polish over the growth line as a temporary solution.
Special Care Instructions for Active Lifestyles
Protect your coffin French tips during high-impact activities:
Fitness Enthusiasts: Apply an extra layer of builder gel at the stress points (where the free edge meets the nail bed) for additional reinforcement before high-impact activities.
Frequent Hand-Washers: Apply cuticle oil after each wash and wear waterproof gloves when possible during extended water exposure.
Manual Jobs: Opt for a slightly shorter coffin shape ("mini coffin") and reinforce with fiberglass wraps under your enhancement for extra durability.
Keyboard Workers: File the corners of your coffin shape slightly rounded to prevent catching on keys and add extra top coat to high-friction areas.
Sports Players: Consider temporary protection like nail guards during games or use athletic tape to protect nails during high-risk activities.
When and How to Safely Remove Your French Tips
Proper removal is essential to protect your natural nails:
When to Remove:
When lifting exceeds 30% of the nail
If you notice any signs of infection or severe damage
After 3-4 fill cycles to give your natural nails a break
Before extended periods when maintenance won't be possible
Safe Removal Process for Gel Systems:
File the top layer to break the seal of the top coat
Soak cotton pads in acetone and place on nails
Wrap each finger in aluminum foil
Wait 15-20 minutes for product to soften
Gently remove foil and cotton
Use a wooden stick to carefully push off softened product
Never force removal if product is still firmly attached
If needed, repeat soaking process
Aftercare:
Gently buff natural nails to remove any residue
Apply a nail strengthener or treatment
Use intensive cuticle oil multiple times daily
Allow nails to breathe for at least 24-48 hours before reapplication
Use a keratin treatment to restore natural nail integrity
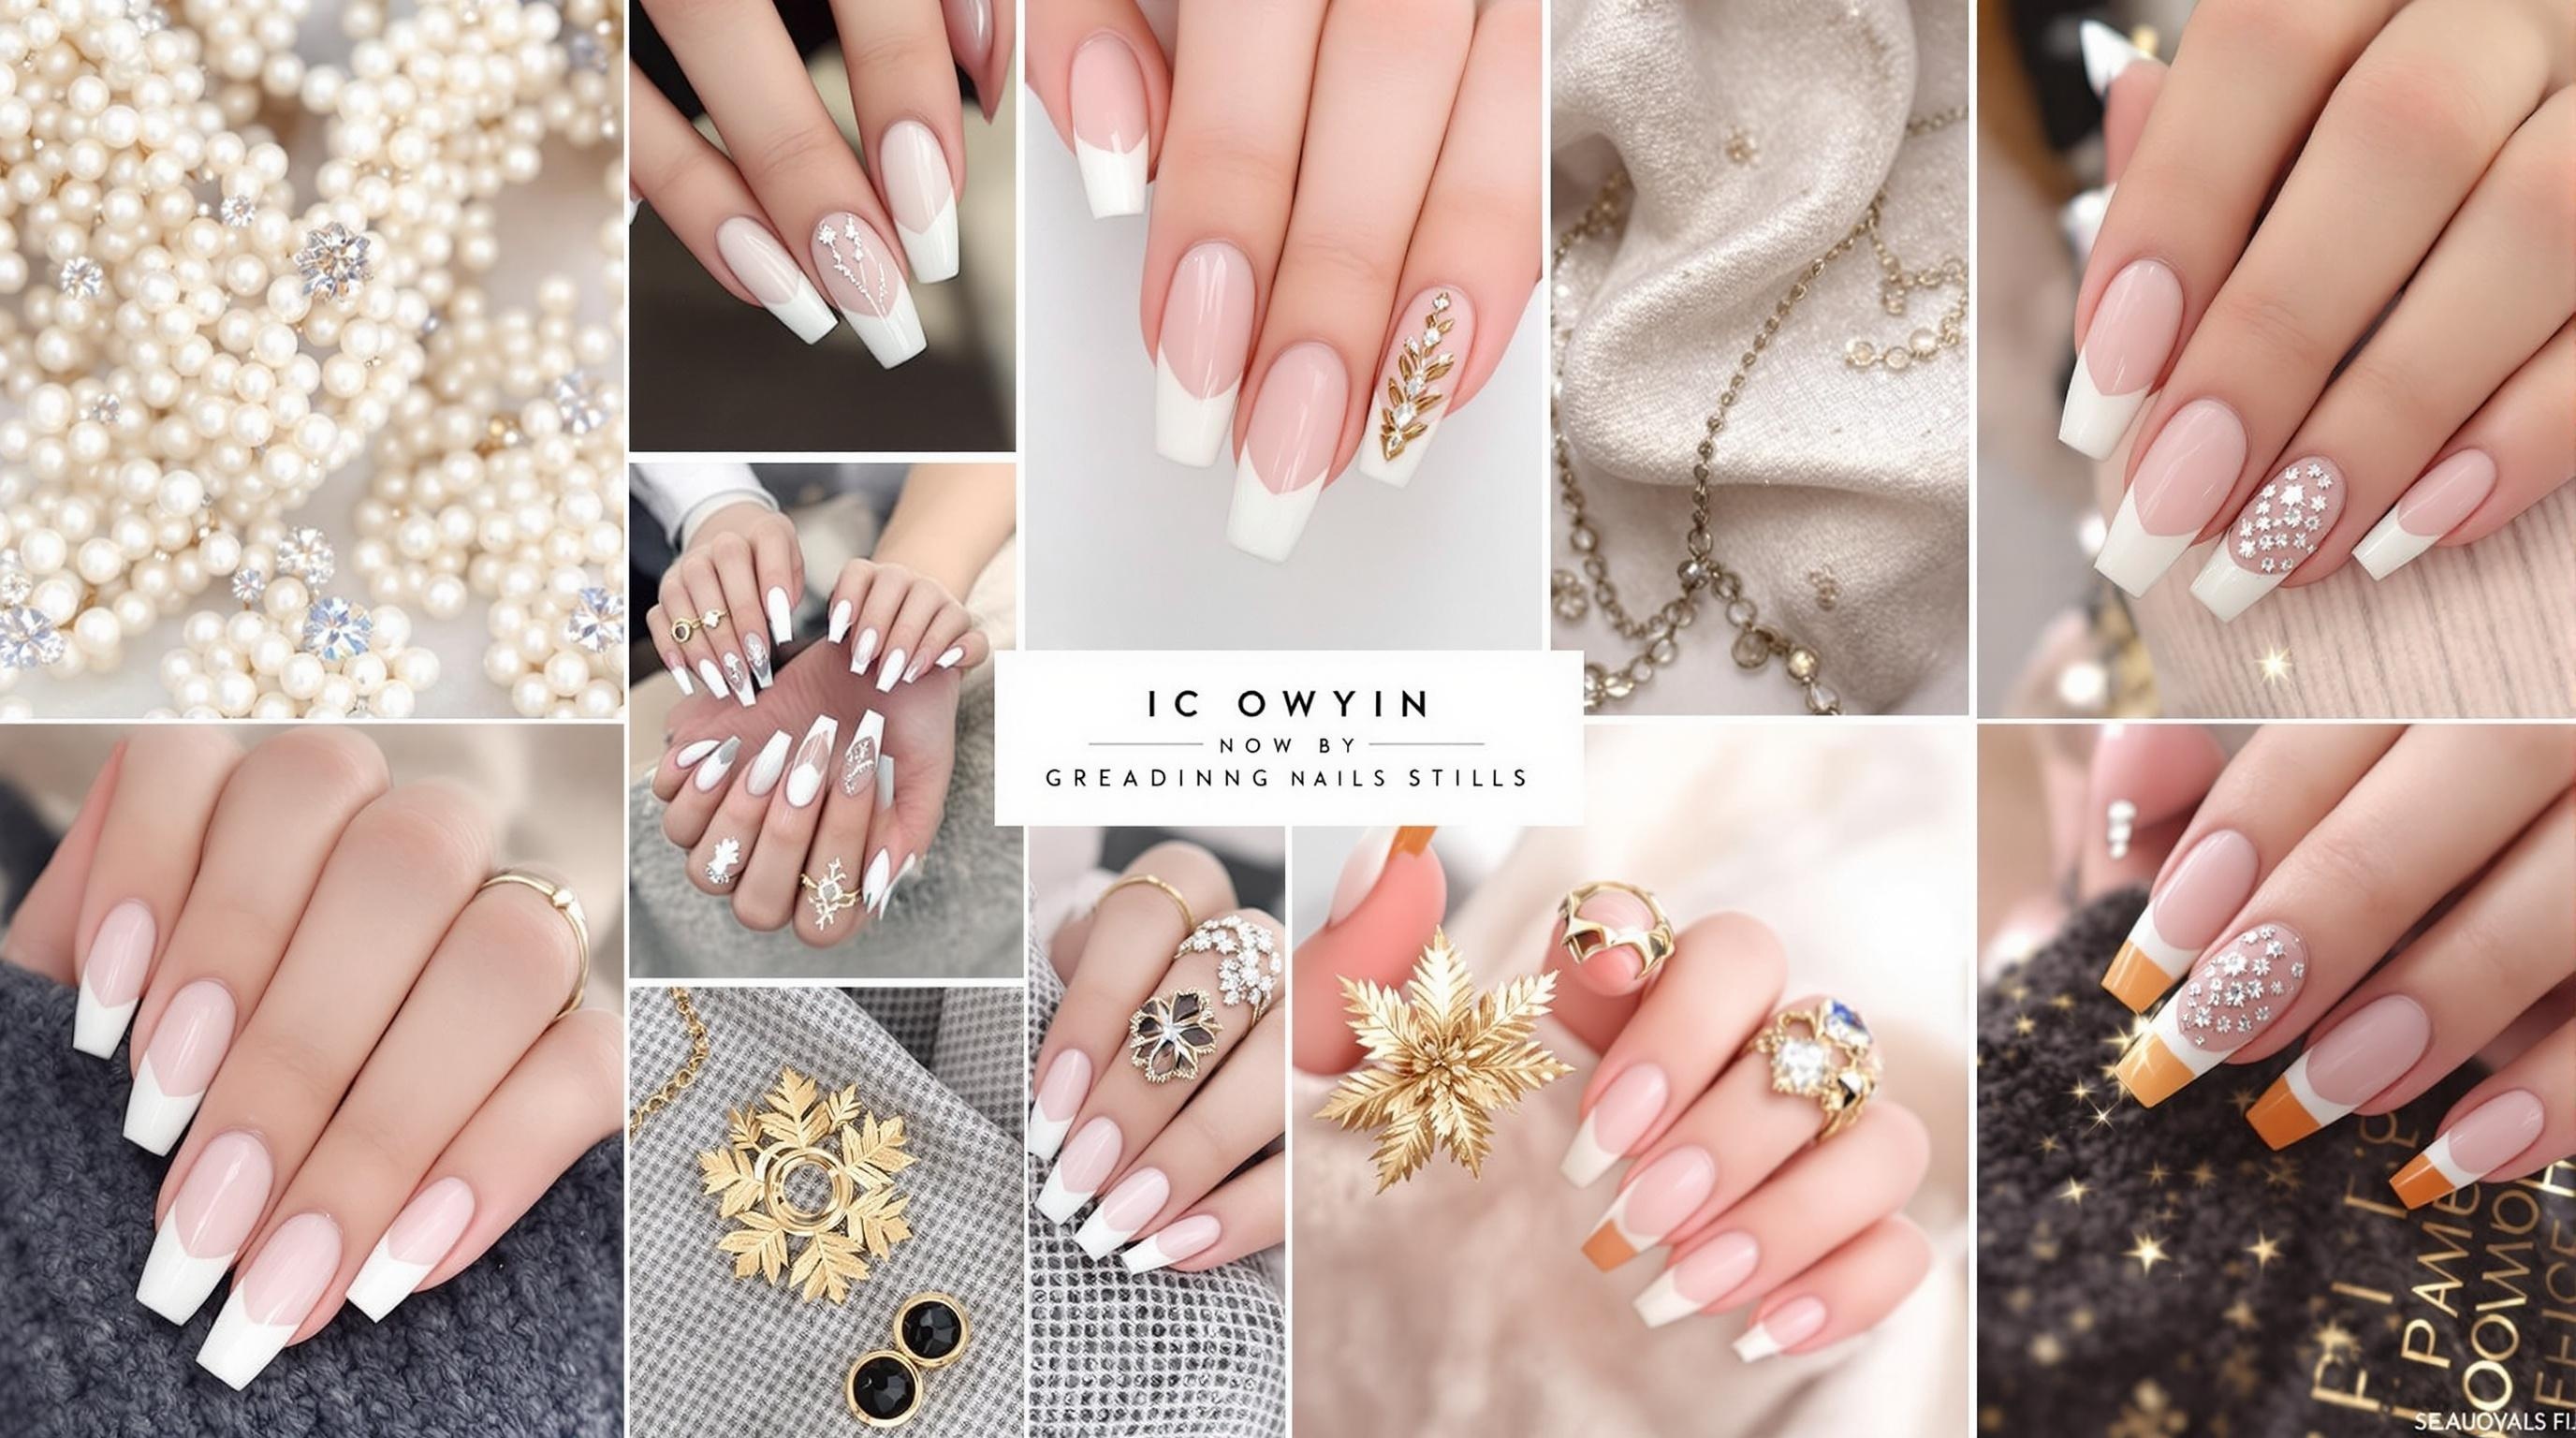
X. Inspiration Gallery: Coffin French Tips for Every Occasion
Everyday Elegant Designs for Work and Casual Settings
These sophisticated yet practical designs balance style with functionality:
The Classic Reimagined: Traditional white tips with a thin gold chrome line tracing the smile line. The subtle metallic accent adds interest without overwhelming. Best on medium-length coffin nails with a slightly rounded edge for practicality.
Neutral Ombré: A gentle gradient from beige to white creates a soft, diffused French tip that grows out gracefully. This low-maintenance option requires less precision at touch-up time.
Micro-French with Accent: Ultra-thin white tips across all nails, with a single accent nail featuring a delicate geometric pattern in the same white. Perfect for conservative work environments that allow subtle nail art.
Matte and Glossy: Traditional French tips with a twist—alternate between matte and glossy top coat on each nail. This textural contrast creates visual interest without color.
Nude-on-Nude: Use two slightly different nude shades for a tone-on-tone French tip that's nearly imperceptible from a distance but shows subtle sophistication up close.
Special Occasion Styles
Elevate your coffin French tips for memorable events:
Wedding-Ready Designs:
Pearl Embellished: Classic French tips with tiny pearls embedded along the smile line for romantic elegance.
Crystal Cascade: Gradient placement of crystals starting dense at the cuticle and becoming sparse toward the tip, all over a traditional French manicure.
Lace Effect: White French tips with delicate white lace patterns painted or stamped over a sheer pink base.
Something Blue: Traditional French tips with a thin line of pale blue tracing beneath the smile line as your "something blue."
Date Night Designs:
Burgundy French: Replace white with a deep wine shade for sophisticated edge.
Metallic Fade: Gold or silver ombré tips that catch the light with every gesture.
Heart Cutout: A tiny heart negative space within the white tip on the ring finger nail.
Black Reverse French: White nail with black cuticle area for dramatic contrast.
Gala and Formal Event Styles:
Foil Tipped: Traditional French tip shape using gold or silver foil instead of white polish.
Encapsulated Glitter Fade: Clear tips with suspended glitter particles that graduate in density toward the edge.
Color-Matched: Tips that precisely match your gown color for coordinated elegance.
Crystal Framed: French tips outlined with a single line of micro crystals for maximum sparkle.
Seasonal Adaptations
Adapt your coffin French tips to reflect the season's palette and mood:
Spring/Summer 2025:
Pastel Tips: Replace white with soft lavender, mint, or peach tips.
Fruit-Inspired: White tips with tiny hand-painted fruit accents (watermelon slices, citrus, berries).
Sunset Gradient: Tips that transition through sunset colors—orange, pink, and purple.
Marine French: White tips with thin aqua or teal lines underneath for a beach vibe.
Floral Accents: Traditional French tips with delicate pressed flowers encapsulated at the cuticle area.
Fall/Winter 2025:
Tortoiseshell Tips: Replace white with amber and brown tortoiseshell pattern.
Velvet Effect: White tips with magnetic velvet powder for a textured look.
Snowflake Accent: Classic French with delicate snowflake design on accent nails.
Emerald Edge: Deep green tips on nude base for holiday sophistication.
Metallic Color-Block: Half traditional white tip, half gold or copper for festive events.
Celebrity-Inspired Coffin French Tips Worth Trying
Draw inspiration from these trending celebrity nail looks of 2025:
The "Red Carpet French": Popularized by A-list celebrities, this look features an extremely thin white micro-French tip with a sheer pink base and glass-like top coat for maximum shine. Best on longer coffin nails.
The "Pop Star Double-French": A traditional white tip paired with a second colored line that runs parallel just below the white. Often seen in contrasting bright colors on performers.
The "Model Off-Duty": A deconstructed French tip with intentionally imperfect, artistic placement of white, often with negative space and abstract elements.
The "Reality Star Glam": Oversized French tips with chrome finish and large crystal embellishments placed strategically on accent nails.
The "Actress Minimalist": Barely-there French tips with a rounded rather than straight smile line, creating a natural-looking enhancement that photographs beautifully.
Customization Ideas for Your Personal Style
Make French tips uniquely yours with these personalization approaches:
Signature Color: Replace traditional white with your personal signature shade that complements your wardrobe and skin tone.
Meaningful Symbols: Incorporate tiny symbols meaningful to you (initials, birth signs, lucky numbers) as subtle accents near one smile line.
Personality-Driven Placement: Adjust the depth and shape of your smile lines to reflect your personality—deep and dramatic for bold individuals, subtle and shallow for minimalists.
Lifestyle-Adapted: Customize your French tips based on activities—shorter, more practical versions for active lifestyles, artistic variations for creative professions.
Mixed Media Expression: Combine your favorite nail art elements (foils, dried flowers, negative space) with French tips to create a signature look that tells your story.
XI. Expert Interview Insights
Professional Nail Tech Secrets for Perfect Coffin French Tips
We interviewed leading nail professionals to uncover their closely-guarded techniques:
"The secret to a perfect smile line isn't just about the brush—it's about body positioning. I teach my students to position their bodies directly in front of the nail they're working on and to turn the client's hand, not their own body. This gives you the most stable angle for creating symmetrical curves."
— Maya Chen, Celebrity Nail Artist with 15+ years experience
"For longer-lasting coffin French tips, I always use a different application method than most techs. I apply a clear builder gel layer first, cure it, then etch the smile line into it with a fine bit. This creates a physical groove that I then fill with white gel. This structural smile line lasts weeks longer than surface application."
— Javier Rodriguez, Nail Competition Champion
"Temperature control is everything with white gel application. I always warm my white gel between my hands for 30 seconds before applying. Cold gel is stiff and drags, creating uneven smile lines. Slightly warmed gel flows smoothly and self-levels for that perfect curve."
— Dr. Sarah Kim, Nail Product Formulation Specialist
Industry Forecasts for Future French Tip Trends
Expert predictions for where French tip designs are heading next:
Sustainable French: Bio-sourced gel formulations specifically designed for French tips, with improved wear without harmful ingredients. Expect to see compostable nail extensions becoming mainstream by late 2025.
Tech-Enhanced Tips: French tips with embedded NFC technology allowing wearers to store information, make payments, or interact with smart devices. Already in development with expected consumer availability in 2026.
Adaptable French: Color-changing French tips that respond to temperature, UV exposure, or even mood through bioresponsive pigments. Currently being tested by major beauty brands.
Textural Renaissance: Three-dimensional French tips with sculptural elements creating visual and tactile experiences. Moving beyond flat surfaces to architectural nail art.
Wellness Integration: French tips infused with vitamins and treatments that gradually release to improve natural nail health while wearing enhancements.
Materials Innovations Changing the French Tip Game
New technologies and materials revolutionizing coffin French tips in 2025:
Self-Leveling White Gels: New formulations that automatically create perfect smile lines with minimal technician intervention. These gels contain specially engineered polymers that respond to nail curvature.
Flexible Builder Systems: Evolution of hard gels that maintain the strength needed for coffin shapes while offering unprecedented flexibility, reducing breakage by up to 70%.
Pre-Curved Extension Forms: Anatomically designed nail forms specifically created for coffin shapes with perfect tapering built in, eliminating guesswork in shaping.
Smart-Cure Technology: LED lamps that automatically detect gel application and adjust curing times and intensity for optimal polymerization without heat spikes.
Nano-Bond Base Coats: Revolutionary adhesion technology that creates molecular bonds with the natural nail while remaining completely gentle and damage-free during removal.
Sustainability in Modern Nail Art
Eco-conscious approaches to coffin French tips gaining popularity:
Water-Based Systems: New water-permeable gel polishes allow moisture and oxygen to reach the natural nail while still providing long-lasting French tips.
Plant-Based Extensions: Biodegradable nail tips made from corn starch and cassava are providing sustainable alternatives to traditional plastic tips.
Recycled Materials: Some brands now offer glitters and embellishments made from recycled plastics and metals, allowing guilt-free nail art.
Reduced Chemical Formulations: 10-free, 15-free, and even 20-free formulations maintaining performance while eliminating potentially harmful ingredients.
Refillable Systems: Eco-friendly packaging allowing polish and gel refills without discarding containers, significantly reducing salon waste.
Energy-Efficient Curing: Next-generation LED lamps using up to 80% less energy while providing faster cure times.
"The future of French tips isn't just about aesthetics; it's about responsibility. The most innovative brands are now developing products that are both cutting-edge in performance and minimal in environmental impact. By late 2025, I believe we'll see completely plastic-free salon services becoming standard, not exceptional."
— Emma Lawson, Sustainable Beauty Advocate and Salon Owner
XII. Conclusion
Your French Tip Journey: From Beginner to Pro
Mastering coffin French tips is a transformative skill that evolves through distinct phases of development:
The Foundation Phase: You've now learned the fundamental techniques for creating coffin shapes and basic French tips. This knowledge forms the essential groundwork for all future nail artistry.
The Refinement Phase: As you practice, you'll develop muscle memory and precision. Each application becomes more consistent, and your smile lines gain that professional symmetry.
The Creative Phase: Once the basics become second nature, you'll begin to experiment with colors, textures, and embellishments, developing your signature style.
The Mastery Phase: At this level, you intuitively adapt techniques to different nail types and client needs, problem-solving on the fly and creating consistently exceptional results.
This progression isn't just about technical skill—it's about developing an artistic eye, gaining confidence, and expressing creativity through this versatile medium. Remember that every expert began as a beginner, and consistent practice is the bridge between the two.
The Confidence Factor: How Mastering This Technique Transforms Your Nail Game
The impact of mastering coffin French tips extends far beyond the technical achievement:
Versatility: Once you've conquered this challenging technique, nearly all other nail art forms become more accessible. The precision required for French tips transfers to virtually every other skill in nail artistry.
Client Trust: For professionals, perfecting French tips immediately elevates client perception of your expertise. It's often considered the benchmark of a truly skilled technician.
Time Efficiency: As your skill increases, your application time decreases dramatically, allowing for more clients or more elaborate designs within the same timeframe.
Problem-Solving Abilities: The challenges of French tips teach you to adapt to different nail beds, hand shapes, and product behaviors—skills that enhance all your future nail work.
Creative Freedom: Mastering the rules gives you the knowledge base to confidently break them, innovating new variations on this classic design.
Invitation to Share Your Creations and Join the Community
Your French tip journey doesn't end with this guide—it's just beginning. We encourage you to:
Document Your Progress: Take before-and-after photos of your work to witness your improvement over time.
Share Your Designs: Use social media hashtags like #CoffinFrenchTips #NailProgress and #FrenchTipJourney to connect with fellow enthusiasts.
Join Online Communities: Participate in nail forums and groups where you can ask questions, share challenges, and receive feedback from peers.
Find a Mentor: Connect with experienced nail artists willing to provide guidance as you refine your technique.
Enter Competitions: Challenge yourself by participating in nail art contests, even as a beginner—the feedback is invaluable.
Remember that the nail art community is generally supportive and eager to welcome new members. Your unique perspective and style contribute to the evolution of this art form.
Final Tips for Ongoing Success with Coffin French Tips
As you continue your journey, keep these guiding principles in mind:
Consistent Practice: Set aside dedicated time each week to practice specific aspects of your technique.
Intentional Evaluation: Regularly assess your work with a critical eye, identifying areas for improvement rather than settling for "good enough."
Continued Education: The nail industry evolves rapidly. Stay current with new products, techniques, and trends through workshops, online courses, and trade publications.
Tool Investment: Gradually upgrade your tools as your skills improve. Professional-quality implements make a significant difference in your results.
Embrace Failure: View mistakes as valuable learning opportunities rather than setbacks. Every imperfect smile line teaches you something.
Cross-Training: Study adjacent art forms like painting, drawing, or even calligraphy to enhance your fine-motor skills and artistic eye.
Self-Care: Protect your most valuable tools—your hands and eyes—with proper ergonomics, good lighting, and regular breaks.
The art of coffin French tips is both technical and creative, practical and expressive. By mastering this versatile technique, you've added a timeless skill to your repertoire that can be continuously reinvented and personalized throughout your nail journey.
XIII. Resources and References
Recommended Products List
These high-quality products have been vetted by professionals for creating perfect coffin French tips:
Base Materials
Product
Best For
Price Range
Young Nails Synergy Gel
Strong, flexible builder gel for extensions
$$$
OPI GelColor in "Alpine Snow"
Pure white for French tips
$$
CND Shellac "Romantique"
Perfect pink-nude base
$$
Aprés Gel-X Tips
Pre-shaped coffin extensions
$$$
Kiara Sky Dip Powder "French White"
Long-lasting dip powder French tips
$$
Essential Tools
Product
Best For
Price Range
Melodysusie 48W LED Lamp
Budget-friendly curing
$
The GelBottle BIAB Brush
Precise smile line application
$$
Mitty Burns 00 Detail Brush
Ultra-fine french line work
$
Kupa Manipro Passport E-file
Professional electric filing
$$$
Young Nails Precision Smile Line Tool
Perfect curved lines
$
Special Effect Products
Product
Best For
Price Range
INBP Chrome Powder Kit
Metallic French tips
$$
Swarovski Crystal Pixie Edge
Premium crystal embellishments
$$$
Gelish Structure Gel
3D French tip designs
$$
Bluesky Luminous Powder
Glow-in-the-dark tips
$
Daily Charme Nail Art Foil
Metallic accents and transfers
$
Price Range Key: $ = Budget ($5-15), $$ = Mid-range ($16-30), $$$ = Professional ($31+)
Educational Channels and Accounts to Follow
Enhance your skills by following these educational resources:
YouTube Channels
Nail Career Education
Young Nails Inc
The Nail Hub
Kirsty Meakin (Naio Nails)
Suzie's Nail Career
Instagram Accounts
@nailsbybeccajean
@thehotblend
@nailmastered
@celina_ryden
@amygthenailtech
Online Courses
Nail Mastery by Paola Ponce
The French Nail Academy
E-File Mastery Course by Nail Boss
Precision French with Celina Ryden
Builder Gel Excellence by Young Nails
Industry Publications
Nails Magazine
Scratch Magazine
American Salon
Nail Pro
Professional Beauty
Troubleshooting Guide for Common Issues
Problem
Possible Causes
Solutions
Lifting White Tips
Insufficient preparation
Oil contamination
Product incompatibility
Use nail dehydrator before application
Ensure complete product curing
Use same brand system for all layers
Yellowing White Tips
UV exposure
Product quality issues
Smoking or cooking stains
Use UV inhibitor top coat
Switch to premium white gel
Apply white refresher every 5-7 days
Breakage at Stress Points
Improper apex placement
Too thin application
Improper coffin tapering
Build proper structure with apex at stress point
Reinforce sidewalls of coffin shape
Consider fiberglass or silk wrap reinforcement
Fading Smile Line
White not opaque enough
Base color bleeding
Insufficient curing
Apply two thin layers of white instead of one thick
Wait for complete curing between layers
Use more opaque white formula
Uneven Coffin Shape
Inconsistent filing angle
Asymmetrical starting shape
Visual distortion from hand position
Use a nail form as visual guide while filing
View from multiple angles while shaping
Mark center point of free edge as reference
Printable Template for Perfect Smile Lines
Below is a downloadable guide to help you achieve consistent, perfect smile lines every time. Simply print at actual size, cut out templates for practice, or use as a visual reference. Templates include varied depths and curves to suit different nail beds and style preferences.
Standard Smile Line: The classic curve for traditional French tips
Deep Smile Line: For dramatic French with more white exposure
Shallow Curve: For subtle, natural-looking French tips
Squared Smile Line: For modern geometric French variations